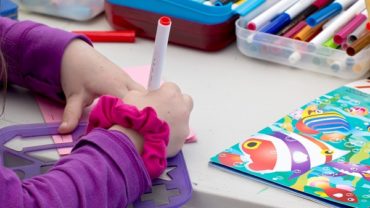
Crafts for kids is a great activity that brings many benefits to your kids. For example, development of kids’ fine motor coordination, boosting kids’ self esteem and letting kids learn about self-control and patience.

Given the many benefits listed above, parents should let their children try doing crafts more often.

To celebrate Hot Air Balloon Day, try making a fun hot air balloon craft with your kids today!

The following video is an interesting video to show you how you can try making this easy hot air balloon craft with your kids.

Watch it now and comment below to share with us whether will you try it!


Easter holiday is the best timing for family bonding. There are many things you could do to spend quality time with your kids.

Amongst the many activities to do on Easter, Easter crafts for kids are something you should definitely try with your little ones.

Trying out different DIY Easter crafts with your kids is a great way to help your kids express their creativity, learn to plan and solve problems through arts, develop their motor skills, and make fun memories with you to treasure throughout their life.

If you are looking for easy Easter crafts for kids, try this DIY Easter Bunny project with toilet paper rolls and scrapbook paper!

It is fun and easy. You will enjoy it! Try it out and share your experience with us in the comments section below!

Via Crafts By Courtney: DIY Gingham Scrapbook Paper and Toilet Paper Roll Easter Rabbits

Craft Materials

Before starting this project, you’ll need the following materials:

Toilet Paper Rolls, Glitter, Markers, Pom Poms, Googly Eyes, Scrapbook Paper, Bow Tie Noodles, Clothespins, Glue, Hot Glue

I’m SO excited to work on Easter crafts again with the boys. One of the first crafts I want to make this year were toilet paper roll Easter rabbits.

We made TP roll Easter bunnies last year, but wanted to give these a fresh spin!

Getting Started

As with ALL my crafts, I made a quick trip to Michaels for supplies. I had most of the supplies on hand for this one, BUT I just needed the perfect scrapbook paper.

I was so lucky and found all these DIFFERENT shades of gingham and fell in love with ‘em!

Step 1 – Create Your Rabbit’s Body

I pre-cut the rabbits bodies, so my son was able to glue them on HIMSELF. We applied glue along the backside of the paper and gently wrapped it around the toilet paper roll.

We then secured the scrapbook paper with TWO clothespins.

Step 2 – Make Your Bow Tie

This step was super easy…all we did was COVER the bow tie noodles in glue and sprinkle them with glitter!! Easy as that.

Step 3 – Add Your Rabbit’s Face

My son added his eyes, nose and mouth all by himself. The eyes went on perfect with the glue, BUT the pom pom nose was not so easy.

With the eyes and nose IN PLACE, take your black marker and draw on your bunny’s mouth and whiskers. That’s it!

Quick Tip: If the nose ISN’T sticking, I suggest using a little hot glue to keep in place.

Step 4 – Make Your Rabbit’s Ears

I decided to do the rabbits ears myself. I folded AND glued together my scrapbook paper and let dry 20 minutes. Once the glue was DRY, I cut in half.

Then, I added a little glue to the bottom and used a clothespin to secure in place for 20 minutes.

When I added the ears to the rabbit, I dabbed a little glue at the BOTTOM and once again used my “Handy Dandy” clothespins to keep in place.


Step 5 – Finishing Touches

Once the face was DRY, we hot glued on our rabbits’ bow ties and hair bows!

They turned out super cute. My son was really excited to show off his rabbits to everyone. I’m really GLAD he still gets excited with all our craft projects 🙂

Once again, our crafting time was a SUCCESS!! We had lots of fun and some laughs while creating a special memory together.

That’s my favorite part…creating the memories.

We had lots of fun…while creating a special memory together.

I hope my boys look back (when they get older) and remember these times. Because I know there will be a time making toilet paper roll rabbits with mom WON’T be fun…


Paper could be called the ultimate craft material. There are so many types of paper, from tissue paper to shiny magazine pictures, and from basic construction paper to newsprint. Here are some ideas for some creative paper crafts for kids using this fun medium.

Easy Crafts for Kids

1. Paper Lantern

Like many paper crafts, you can use a variety of paper types for this craft. Leftover wrapping paper is particularly attractive, but you can use catalogues, magazines, or construction paper. If you have an old phone book, you could even use pages from that! All you need is the paper, scissors, and glue. Here’s how.

* Fold a rectangular piece of paper in half lengthwise.

* Cut slits along the fold, 1/4 to 1/2 inch apart, stopping about an inch from the top edge.

* Unfold the paper, and then turn it sideways.

* Curve the cut paper around and attach the short ends of the rectangle using the glue (clear tape or staples would also work).

* To make a handle, simply take a strip of paper and glue each end across the top, leaving a curve over the top. If you like, make lots of lanterns and string them on a cord or yarn using this handle.

2. Paper Bags

Crafts for Kids

If you take your lunch to school or work, you know how many of these handy little bags you go through. Why not recycle a few with some crafts? Here are some paper bag craft ideas.

* Gift Bag – Decorate a brown bag with a stencil, stamp, or free-hand painting and create a custom gift bag, perfect for a jar candle or other similarly-shaped gift.

* Puppets – Fold a paper bag so that its bottom is flush with the side (the way it usually is in the package). On the flap, which is the underside of the bag when it’s unfolded, make a face using cut-outs from construction paper, feathers, buttons, markers, googly eyes and so forth. Bird faces work well because the beak overlaps and covers the flap like an upper “lip.” Put your hand in a have fun!

Paper craft for kids

* Luminaries – Using a hole-punch, cut designs in the sides of a folded paper bag. Open it up, and then fill the bottom with an inch or so of sand. In the middle of the sand, well away from the sides of the bag, insert a votive candle or tea light. Use these only outdoors on concrete or asphalt, away from any grass, leaves, or other foliage and objects.

3. House

Paper Crafts for Kids

Search online or at your local library for a template of a paper house. It will have tabs along the edges of the template that you will use to attach the “walls.” Print it out or photocopy it, using the paper type and color of your choice. Then color the parts if you like. The template can then be cut out and assembled by folding along the lines and gluing the tabs together.

Try out these fun and easy paper crafts for kids to spark their creativity!