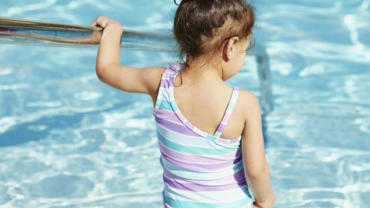
via THE WILDERNESS SOCIETY: Hiking with kids is a great way to get them connected to the outdoors at a young age, but it can also be intimidating for the parent planner.
We challenge you to get the kids in your life out on the trail this summer, because part of preserving wilderness for future generations is teaching youth to appreciate and enjoy nature. Here are ten tips to help:

Keep it easy & feature-friendly. For at least the first few times, select a hike that isn’t too long or too strenuous – remember that for kids, the hike is about the experience. Picking a trail that has some features – be it a lake, stream, waterfall or something else will keep kids occupied and give them a goal to reach. And remember, it’s about the journey not the destination. If your child is more interested in getting down on his or her hands and knees to explore the undergrowth, then that is the experience for the day – there will always be a next time.

Time is your friend – so plan for lots of it. Kids are natural explorers and want to pick up and touch everything. This is one of the greatest things about hiking – there’s so much of the natural world for kids to discover and examine – make sure they have time to get their wilderness fill.

Prepare for anything. This pretty much goes for any hike, regardless of whether or not a child is involved. Always make sure to pack the 10 Essentials. Additional kid-friendly supplies are: wet wipes or tissues; lip balm; binoculars; magnifying glass; field guides (to point things out to kids); camera; and safety whistles for each child (and teach them what they are for and when to use them).

Dress for success. Layers, layers, layers. Make sure that you take ample amounts of clothing in case your child gets chilled while out on the trail. Always bring rain clothes – aside from the wet weather, they can also be great windbreaking clothing. Don’t forget hats and gloves for everyone – even in the summer, mornings can be chilly. Make sure your kids have adequate hiking shoes, depending on terrain, this could range from sandals to tot-sized hiking boots. Finally, always pack a change of clothes for each child and leave them in the car for your return from the trail – chances are your children will be wet or muddy!

Plan frequent energy stops. Hiking requires a lot of energy. Energy-sapped kids often equate to cranky kids. Keep your child happy and motivated by taking numerous small breaks for fluid and food. You can also use energy breaks as a way to keep your child moving by saying, “at that footbridge, we’ll take a break and have a snack.” Chances are, by the time they have had that snack, they will be eager to continue. Also take a medley of snacks in case your child becomes a picky eater out on the trail.

Pick a leader and make sure to rotate. Kids love feeling like they are in charge. Having the children take turns leading the hiking group can help the kids feel empowered – just make sure that the leadership rotates or this could lead to arguments further down the trail. By allowing the kids to lead, you can also make sure that the pace is slow enough so they can keep up.

Make it fun! The key to hike success is to keep the kids motivated and having fun – so why not combine the two? Create games that you and your children can play out on the trail. Have them look for signs of wildlife (scat, bird holes in trees, fur) or count wildflower species. Organize a scavenger hunt and have them find things are bumpy, smelly, small, big, living, wet…the list goes on!

Believe in the power of positive reinforcement. This is something parents excel at and it shouldn’t be left at the trailhead. When hiking, go overboard in telling your child how well they are hiking, how strong they look and how fast they are – even if they aren’t. Kids need to hear that they are doing an awesome job, especially if it’s their first time out on the trail (I’d say adults need this just as much, really!).

Leave no trace. Kids are future stewards of our public lands, so we might as well begin teaching them how to take care of those spectacular wild places at a young age. When out on a hike, make sure that all of your trash is collected – taking a gallon size zip-top plastic bag always works well for this – the “pack it in, pack it out” concept is fully embraced on our trails. To further reinforce this idea, you could also take a small garbage bag and have the kids pick up any litter they see on the way back to the car. While taking a break, make sure to examine the area and see that everything is in its place. If your child dug a hole with a stick, cover it up again before you leave. For more information on Leave No Trace, visit www.lnt.org.

Hike often! Start a family tradition of going hiking one or more times a month. Kids love the sense of adventure and doing something new. There’s a wide range of trails, terrain and sights for children to behold. With kids spending a good chunk of their time indoors during the week, hiking on the weekend is a perfect way to get them outside – be it an urban park or wilderness area trail.
Now that we’ve shared some of our trail tips with you, we’d love to hear from you! Tell us your tip to taking kids hiking!


via REI: WHY CLIMBING IS THE PERFECT ACTIVITY FOR YOUR KIDS

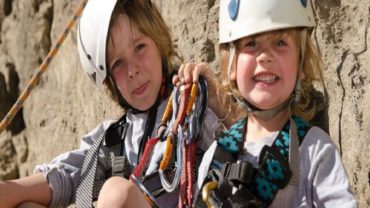
Kids have a ton of energy. What better way to harness the energy into an outdoor activity than introducing the kiddos to climbing.

Climbing teaches critical problem-solving and decision-making skills.
Ascending a climbing route is a lot like piecing together a puzzle. Each move requires a constant, iterative decision-making process—where to go and how best to get there. Over and over again. Learning to solve problems, thinking for yourself (the answer is most definitely not in the back of the book), and making smart decisions are taught skill sets desperately lacking in today’s educational environment, where the focus is on memorizing and reciting for testing purposes.

Out on the crag, it’s a constant real-life, real-time lesson in thinking for yourself, reacting quickly and learning immediately the consequences of your decisions. Climbing is life accelerated, where instant feedback is given for every decision or indecision you make on the wall.

It imparts bravery and the ability to adapt and overcome difficult circumstances.
Overcoming fear is a life skill integral to success. Whether it’s fear of the unknown, fear of getting started or fear of failure, all successful adults learn as kids that you must be courageous, bold and daring to make something of yourself in this world. Encouraging your kids to leave their comfort zones and confront their fears will ingrain character and bravery. Bravery is the reward for taking a chance, overcoming nerves, and escaping the dreaded comfort zone.

It promotes healthy life choices.
Ever seen an obese rock climber? Ever encountered a two-pack-a-day smoker at the climbing wall? Okay, well, maybe “back in the day,” but no longer. Rock climbing loves agility, flexibility, muscular strength and muscular endurance. It hates obesity, laziness and weakness. Climbers are typically healthy eaters and cross-train in all sorts of other activities—from cycling and yoga to dancing and surfing. To be a successful climber, you’ve got to eat well, drink water and build a long, lean muscular body. Being fit and strong goes a long way to enabling success on the crag. Getting your kids climbing will give them a reason to trade greasy chips for apples and the gaming console for a bicycle, all in preparation to flash that 5.10 this weekend.

Rock climbing is an adventure sport that can be learned at relative low risk in highly controlled environments.
For better or worse, climbing has a reputation as an extreme sport. While that’s certainly true of the sport’s elite professionals, most climbing is actually rather pedestrian. Beginner climbers learn on a top rope (the rope is run through an anchor above the route of ascent). Falling on a top rope has basically zero consequences when using the correct anchors and belaying techniques; the length of the fall is roughly equal to the dynamic give of the rope and the climber’s weight—or, practically speaking, a few millimeters. Biking, kayaking, skiing, surfing, etc. are all far more dangerous than rock climbing. In my younger years, I guided and instructed all those activities, and climbing was always the easiest to control and make safe. This makes climbing truly unique in the adventure sports world—you can learn the ropes (pun intended) without risking major injury.

It teaches discipline and focus.
Look, I’m no Great Santini. I’m no drill sergeant. In fact, I’m pretty easy going. However, I’ve been around the block enough to know that self-discipline and focus are traits inherent in the world’s greatest achievers. Climbing is an excellent way to impart the basics of discipline because it requires focus and discipline to succeed. There’s no multitasking or messing around when you’re climbing a vertical rock face. Your kids will quickly learn that climbing narrows the world into a single rock line. No matter what’s going on around them, astute focus on the task at hand and the discipline to see it through is thrust on them from the very moment they plant their first foothold.

And it teaches lifelong outdoor skills: knot tying, route finding, anchor building, rappelling, etc.
Sailing, paddling, backpacking—rock climbing’s hard skills are applicable across the spectrum of outdoor sports. Knot tying, along with map and compass skills and campcraft, lays the foundation of an outdoor education. Learning to read vertical rock makes basic route finding all the easier. Anchor building and rappelling are critical rescue skills. Your kids may gravitate to kayaking, skiing or sailing in their later years, but when their skill set begins with rock climbing it’ll remain with them for a lifetime.

It’s affordable.

A family of four can start sport climbing outdoors for relatively little cost: Four harnesses at $50 each, one rope for $150, a belay device for $25, four sets of (used) rock shoes at $50, and a set of quickdraws for $100 gets the family out on a crag for $675. Considering there are no recurring participation fees, and much of that gear will last a decade, climbing is one of the most affordable outdoor activities available. You’ll be hard pressed to find even one used mountain bike for what it costs to start the whole family climbing. Of course, the sky’s the limit when it comes to gearing up, but getting started needn’t be a major financial investment. Along with the perceived danger involved, the idea that climbing costs a lot to get started is probably the sport’s next biggest misconception.

Climbing provides a healthy dose of humility.
I’m as guilty as anyone: I shower my son with love, attention and positive reinforcement. However, it’s critical to his character development that he fall on his butt. So much of climbing is falling, failing and learning to persevere. It’s important to show your kids how powerful Ma Nature is—that summiting even a short 40-foot pitch can take every ounce of mental and physical ability they have—and that at some point in life we’ll all be humbled before Her power. But learning to persevere in the face of failure is a life lesson that will pay for itself over and over again, long past the day your kids start having kids.

The bottom line: Climbing is “super fun.”
To wrap it up, I conducted exhaustive research straight from the source: my 10-year-old son, an avid climber, skier, mountain biker, skateboarder, hip-hop dancer and backpacker. Over dinner the other day, I asked him why he likes climbing. He thought for a solid nanosecond before blurting, “It’s super fun, Dad! Duh.”

So there you have it. You may not care about the healthy lifestyle climbing promotes or all the intangibles your kids will glean from it, but you can’t deny that being a kid ought to be fun, and climbing is super fun. For my money, having a good time with my boy (while he’s still young enough to want to have fun with me) is more than enough reason to convince me that climbing is the perfect activity for kids.


via treklight: It’s a fact: kids love hammocks!

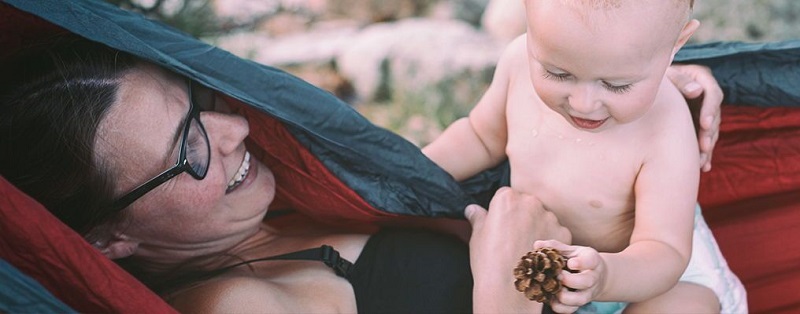
If you have kids, or work with kids, bring a Trek Light Gear portable hammock along on your next trip to the park, playground or wherever you like to take them. The kids will love playing in the hammock and pretty soon you’ll probably find yourself playing (or napping) right there with them!

Chances are, if you grew up with a hammock in your backyard or knew someone who had a hammock in their yard, you have fond memories of playing in it with your siblings or friends. There’s just something about a hammock and the feeling of being elevated off the ground that makes children endlessly entertained.

However, most of those fun memories likely also involve a concerned parent keeping a close eye on the hammock shenanigans, reminding you constantly how easily you could fall out and hurt yourself or get tangled up and caught in the rope.

While you may remember laughing even when you did fall out of the hammock, the truth is that most hammocks do involve a real risk when children are playing.

Trek Light Gear is here to change all of that.

With our safe, No-Flip™ design, you can rest easy knowing that they won’t hurt themselves by getting flipped over and dumped on the ground.

With Trek Light Gear’s kid friendly hammock design, your children can get as close as they want to the edge and the hammock itself will never flip over and put them at risk of getting hurt.

Just as importantly, our soft, parachute nylon design also means that there aren’t any holes, loops, or anything at all for an arm or a leg to get caught in or tangled up in.

While any small child should obviously be supervised whenever possible*, we’ve taken the worry out of the hammock experience to give your children, or the children you’re responsible for, a product that is safer and more comfortable than the hammocks you grew up with – without losing any of the fun.

Trek Light Gear’s portable hammocks hold up to 400 pounds, so your kids can sit in the hammock together, or sit in the hammock with you as you read a book or tell stories.

Our line of Double Hammocks are the perfect size for the whole family. When the kids need a rest from the playground or the game, they can curl up in a portable hammock and rejuvenate instead of getting cranky from too much activity.

Does your child have trouble napping?

There’s something about a hammock that makes the idea of a nap just fun enough that even kids who hate taking naps will be begging to get into the hammock for nap time.

Because our ultralight hammocks pack down small for travel, you can set your hammock up at barbeques, in your kids’ bedrooms, on playgrounds, or anywhere else where you or your kids could use some downtime. If you already have a sturdy playground or swing set in your backyard you can usually hang the hammock right from the playground itself, so you never need to decide between one or the other if space is an issue.

Trek Light portable hammocks can add a great new twist to the summer overnight sleepover – next time the kids ask if they can sleep outside in a tent, let them sleep under the stars and they’ll soon be begging for more outdoor adventures!

Don’t take our word for it, get a Trek Light hammock today and see for yourself – your kids will thank you!

*** While Trek Light Gear’s portable hammocks will never unintentionally spin or flip while in use, it’s certainly possible for anyone (child or adult) to lean or climb too far over the edge and fall out while playing in the hammock. Please remember to use good judgment when small children are playing in the hammock and make sure the hammock is always setup low to the ground and not over any rocks or sharp objects. ***


via Staver Law Group: With the weather warmer, many people are enjoying the outdoors by having outdoor parties and picnics. Picnics are great ways to bring together family, friends, and neighbors outdoors. However, food left outside can quickly get hot and cause food poisoning and other serious health issues. Read on to learn picnic safety tips to ensure your guests have fun – and stay free of food-related illnesses.

Heat can cause foods to develop bacteria. When ingested, these bacteria can cause salmonella and other diseases – some which can deadly. If you developed food poisoning after an outdoor gathering, you may have a potential lawsuit.

Keeping Your Food at Safe Temperatures
Don’t let a trip the emergency room ruin your outdoor gathering. Follow these 10 tips to keep foods – and your guests – safe.

1. Have plenty of water on hand. While you should have bottled water for drinking, it’s also a good idea to have water available to clean tables and other eating surfaces.

2. Wash hands often. Keeping hands clean cuts down on the risk of contamination. If no running water is handy, use hand sanitizer or moist towelettes to prevent cross-contamination.

3. Bring plenty of plates. Have one plate designated for raw foods and the other for cooked foods so you can prevent contamination.

4. Make sure meats are fully cooked. Hamburgers should be cooked to at least 160 degrees and chicken breasts to 165 degrees. Meats should be cooked enough so there is no pink.

5. Keep perishable items cold. Bring enough ice and gel packs to keep meat, eggs, and salads at 40 degrees.

6. Keep coolers in the car. When transporting food, keep it out of the trunk and inside an air-conditioned car. Once you reach your destination, keep coolers in the shade with the lid closed.

7. Pack your cooler full. Add as much food as possible, since a full cooler stays cold longer than one that is not full.

8. Follow the two-hour rule. Do not keep perishable food out for more than two hours. Place it back into the cooler or a refrigerator. If you’re in doubt, toss it out.

9. Exercise caution in hotter weather. If it is hotter than 90 degrees outside, do not leave food out for more than one hour.

10. Follow the rules for takeout foods. If you plan to use takeout foods at your picnic, be sure to eat them right away. Do not leave them out for longer than one hour.


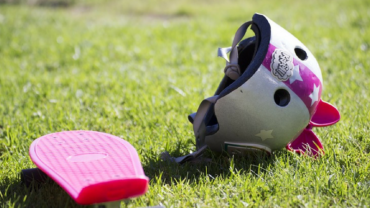
Skateboarding is a great sport that benefits your kids’ health physically and mentally. If you are keen to let your kids try skateboarding, you should start from looking at the question “how to choose a skateboard for your kid”.

There are many different types of kids’ skateboards which ranges from popsicle boards, penny boards, longboards to even electric skateboards, each serving a different purpose.

In order to help you kid choose the right one, you need to first know about the different types of skateboard and what are they commonly used for.

Check out the following video now for you how to choose a skateboard that your kid will love!


Did you know that children are recommend to get 60 minutes of physical activity on a daily basis?

It is sad to find that one-third of the children today are not achieving this recommended amount of physical activities.

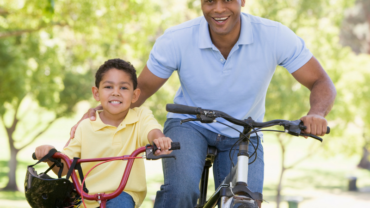
If you are looking for ways to help your little ones be more active, cycling for children is a good option to look at.

Cycling for children is a great way to help improve your little ones’ fitness, let your children release stress, improve their mental health and simply to have fun!

By having more family outings to go cycling with children, parents are also able to bond better with their children!

Interested to get your kids started on cycling? Check out the following video now for an easy guide to teach your kids on how to ride a bike!


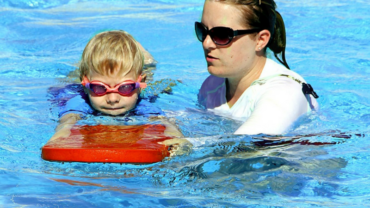
Via Parenting Healthy Babies: 10 Do’s and Don’t for Children Swimming

Swimming is a very good exercise for people no matter how old they maybe. It tones the body muscles just the way you would like to and you need not worry about sweating either! However, when it comes to taking your kids to the swimming pools, you should be more careful. Toddlers do not understand water safety and precautions like you do. You should know things that you should and should not do to ensure your kid has a gala time while learning swimming at the pools!

Below listed are the do’s for kids swimming that should be on your mind:

  • Check facts well– It is important that you start looking for a suitable swimming center for your toddlers. Check in the neighborhood and ask your friends who have already got their kid admitted in such centers. You may also search in the web for information on this regard. You need to dig to know more about the repute of the school and swim coach as well as other aspects like trainer student ratio.
  • Check the timing– It makes sense to get your kid admitted in a swimming coaching center that has flexible timings for classes. If the center has weekend classes or has evening classes that makes things easier for you to take kids after office hours rather than sending them with a friend or neighbor. This way you feel at ease knowing that you are there for your child, should he need you. Your child too will feel less jittery and more confident just knowing that you are around.
  • Keep your eyes on your kids– Even when your child is in the water with trainers around, keep your eyes on him. In the early classes, it is not abnormal for some kids to feel uneasy or swallow some amount of water while learning swimming.
  • Comfort level– Some kids just love water and take to swimming quickly. However, that may not be the case with all kids. For kids that are a little jitterier and feel fear of water, opt for centers where they get more attention of trainers and the crowd is less. Some, such centers use music and flotation devices to encourage kid learners.
  • Health– Before the kids get into water, ensure he or she is in good health. Swimming on an empty stomach should be avoided at any cost. Feed your child a light snack before you hit the pool. The snack should be at least half an hour before stepping into the water. If your child has any infection, exposure to pool water may not be good. Also check for temperature or a cold before taking the baby for a swim each time.

Below listed are the Don’ts for kids swimming that should be on your mind:

  • Choosing between chlorine and saltwater-Some people think that for kids, swimming in salt water pools is better. However, there is no credible evidence that chlorinated water based pools can ruin their skin either. In fact, drinking up or swallowing water of any pool can be bad for the kid.
  • Ignoring germs-The chlorine may be good for keeping water free of germs but it is not enough for the baby’s health. After swimming is done, clean the hands and legs with hand sanitizer sprays. The germs in pool water cannot be seen through the naked eye.
  • Bare swimming– However, young the toddler is, it is a bad idea to let him or her swim bareback in a pool. Ensure the kid has put on proper diapers or swimming attire. Nowadays, you can find specialized swimming outfits for kids of various ages. It should be made of skin friendly material.
  • Drinking pool water– This is what most parents worry about. Now, the truth is some amount of pool water can get inside the mouth, but ensuring the kid does not swallow it is not tedious either. It may lead to stomach problems.
  • Water temperature– Before the baby can learn swimming you should ensure the pool water has suitable temperature. Now, every baby cannot have same temperature sensitivity. However, you should not ignore reaction of the baby.

Summing it up

Do not hesitate to walk an extra mile to ensure the kid becomes comfortable with water before you can take him or her to the swimming pool. Letting the kid splash water freely and play with water in a large tub at bathroom can do the trick. This will also induce the fun factor in the baby’s mindset and he will not take swimming as a tedious battle!


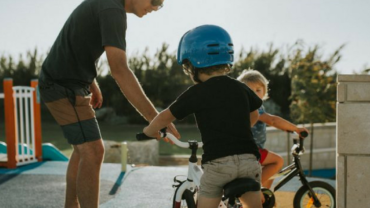
Via Mapmyrun: 7 Tips for Teaching Your Child to Ride a Bicycle

Skinned knees — and mom and dad huffing and puffing behind you — were historically part of the equation, but there are simpler ways to teach your child to ride a bike. Give these seven tips a try to get your child cruising down the road solo in no time.

1. Remove the training wheels and lower the seat

Before your child learns to pedal a bike, they’ll need to perfect balancing. Dedicated balance bikes are a great idea for children starting out, but a regular bike works, too. Just remove the training wheels and lower the seat enough so your child can place his or her feet flat on the ground when needed. Lowering the seat also helps remove some of the fear your child may have of falling, since all they’ll need to do is place their feet on the ground when they start to wobble.

2. Find a grassy area

While most people opt for a neighborhood street or the sidewalk at a local park, finding a grassy area with a gentle downward slope is the way to go. The bike won’t roll as fast as it would on pavement, and if your child takes a spill, the impact won’t be as traumatizing. Ideally, the spot you pick will be about 20–30 meters long, with a gentle decline. This allows your child to ride down the slope without having to worry about pedaling.

To practice balancing, have your child scoot the bike down the slope with his or her feet. As your child picks up speed they can practice coasting by lifting their feet off the ground.

3. Don’t hold onto the bike

Holding on to the back of the bike seat while your child practices is standard practice. However, this can throw off your child’s balance. Let go of the back of the seat and walk behind them instead. Since the seat is lowered, your child can keep his or her feet close to the ground as they scoot down the grassy slope and correct themselves as needed.

4. Keep your child relaxed and having fun

At first, riding a bike can feel awkward and dangerous to some children. While your child practices balancing by coasting, make sure your child is relaxed and having fun. Try not to put any pressure on them to learn too fast. Provide encouragement and practice only as long your child wants to. If he or she becomes frustrated, you can always try again the following day.

5. Have your child look forward instead of down

Looking down at the road or your feet is common for learning to balance, but this actually makes it more difficult to stay upright. Instead, teach your child to look ahead at where they are going. This makes balancing less difficult and eases the transition to the road where they’ll need to keep their head up to look for obstacles.

6. After balance is achieved, practice pedaling

Once your child can safely balance down the grassy slope, you can begin to practice pedaling. Stay on the same grassy area you practiced balancing and encourage your child to begin placing his or her feet on the pedals once they roll for a few meters and gain speed. If your child used training wheels, the pedaling motion shouldn’t be too foreign. If they used a balance bike, you might need to teach them the basics of pushing down on the front pedal and beginning from the stopped position with one pedal in the 2 o’clock position and the other foot on the ground.

While most children pick this up fairly quickly, stay positive and encourage your child even if they’re having trouble at first. Practice as many days as it takes for your child to gain comfort.

7. Don’t forget steering and stopping

Once you get your child moving, you’re halfway there. After balancing and pedaling are out of the way, steering and stopping are two skills your child needs to master to ride safely on their own. To practice steering, set up a few cones in the same grassy area. Have your child practice turns and weaving in and out of figure eights. Staying on the grass protects your child in case of a fall.

For stopping, place the cones at the bottom of the hill and have them practice using the coaster or the hand brake to come to a complete stop at the designated spot. Once they’ve got the basics down, try making a game of it. Play red light, green light or another activity that’s fun and doesn’t focus on mistakes to help them practice safe braking. Before you know it, they’ll be ready to cruise the neighborhood.


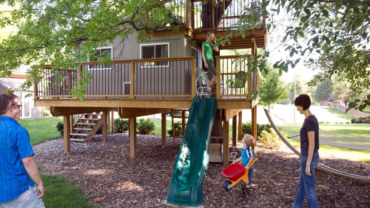
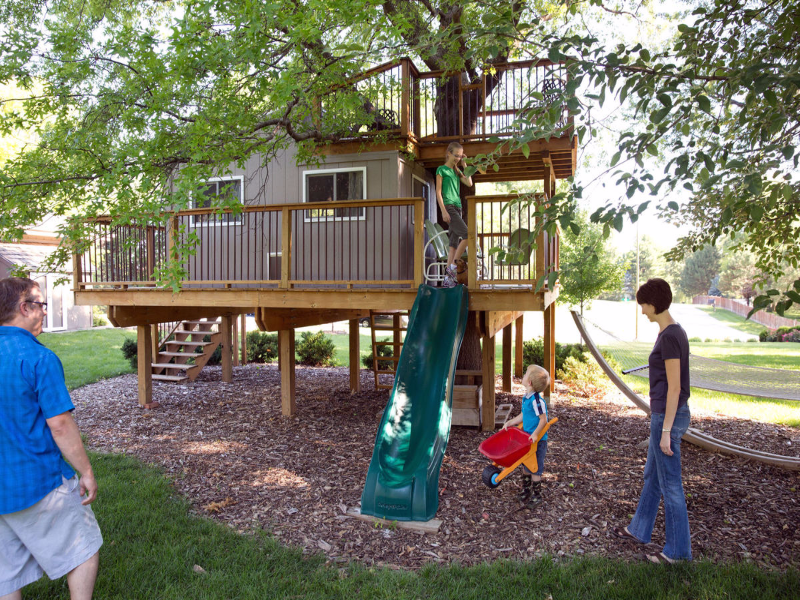
Via Omaha: 5 ways to personalize your kids’ playhouse

Imaginations are like a garden. They require some seeds to come into bloom. Consider your child’s playhouse to be the garden — it’s up to you to supply the seeds.

Make outside play enticing to your little ones this fall by filling an empty playhouse with fun. When you stock them up with a few essentials, your kids will be set for adventure after adventure.

1. Start with seating.

From playing house to coloring pictures, seats are a must. The addition of a child-size table and chairs will be the start of fun. Lightweight ones are great because they let your child rearrange and take them in and out of the playhouse as their imagination demands.

2. Foster reading.

A reading nook in a playhouse is just the spot to have some quiet time and go on trips to other lands. Start with an indoor/outdoor rug that can take a beating from foot traffic and soil. It will provide cushion for lying down and reading. Add a couple of old blankets or beach towels for snuggling. Older kids might like a bean bag chair or two instead of a toddler’s table and chair. Tip: Tie library visits this fall into your playhouse adventures. Pick up a book on the Old West and the playhouse becomes a fort, or read about pirate ships for a sailing adventure.

3. Organize storage with kits.

Some small plastic tubs, the size your child can handle, are perfect for creating fun “kits” for use in the playhouse. Fill one with toy dishes, plastic food and a few aprons for a pretend kitchen. Another can house art supplies or modeling clay. Use another filled with dress-up clothes. Creating a stack of these kits lets your child pick their adventure for the day. Tip: Dole out the kits like it is your own library. Kids can check out one and can’t get another one until they bring back the first one. This keeps the playhouse from getting too full and cluttered.

4. Get artsy.

An outdoor playhouse is the perfect spot to get creative — without making a mess inside your real house. There are a number of ways to create an art wall. Chalkboard paint on a wall makes a big canvas to fill over and over. Magnetic paint allows for all kinds of art to be displayed with magnets or fun to be had with magnetic letters. A tub with markers, crayons and paper can be fun outside as you show your kids how to rub leaves or trace flowers.

5. Personalize the space.

Have some fun with your child’s playhouse. Adding window boxes are great in two ways. You can enjoy planting and watering flowers with your little one, or fill them with artificial flowers they can enjoy taking them out and rearranging. Add a mailbox to your playhouse and give them envelopes to color while playing post office. A battery-powered doorbell or a knocker is a ton of fun for imaginary scenarios. If you want to play house, you need a few housekeeping things. Toy brooms and garden tools allow them to imitate real life. The inside walls are an opportunity for your children to decorate. Let them hang up artwork or posters. Try using painters’ tape on yours, as it is easily removed from most surfaces.

Keep in mind it doesn’t take much more than a suggestion to start outdoor fun. From packing lunch for a picnic in the playhouse to dressing up as a princess for an afternoon in the “castle,” it’s easy to fill a playhouse with fun.


Via Huffpost: What Every Parent Needs To Know About Dry And Secondary Drowning

n a harrowing 2014 blog post, writer Lindsay Kujawa described her family’s brush with secondary drowning after her son, Ronin, slipped into the water for maybe 20 seconds at a pool party. At first he seemed fine, if a bit shaken. But hours later, Ronin was being rushed to the hospital in an ambulance while his mother helplessly watched his oxygen levels fall. Though he recovered, Kujawa wrote that she was “forever changed since this happened.”

“Before [that day] I had never heard of secondary drowning,” she continued. “If I had heard of it before, I would have done things differently.” With that in mind, and with summer swim season upon us, here are five basics about dry and secondary drowning all parents should know:

1. They occur out of the water.

Both dry and secondary drowning are considered atypical types of drowning in that they occur after a child has been pulled out of the water. In dry drowning, water is swallowed, but doesn’t enter the lungs. It does, however, enter the airway, causing it to spasm, which can lead to difficulty breathing and even suffocation, explained Dr. Mark Zonfrillo, a pediatric emergency physician with The Children’s Hospital of Philadelphia.

Secondary drowning, on the other hand, takes place when water actually enters the lungs, he said. It too can lead to potentially life-threatening breathing issues.

2. It’s important to be watchful for hours.

Dry drowning usually happens within minutes after a child has struggled in the water, but when secondary drowning occurs, a child may not show signs of distress for hours, or — in rare instances — even up to a day. “It might not cause any effects immediately, but [secondary drowning] can cause edema or swelling of the lungs in a delayed fashion,” Zonfrillo said. And because the precipitating event may not necessarily look especially dramatic — say, a toddler slips under water for a few seconds — it’s especially critical that parents pay attention to how their child responds after.

3. Look for coughing and fatigue.

“The biggest things to look at are the level of activity, trouble breathing and coughing,” explained Dr. Vincenzo Maniaci, a pediatric emergency medicine specialist at Nicklaus Children’s Hospital in Miami, Florida.

“If your child is suddenly sleepy and that seems unusual for the level of activity they had, that’s a sign to seek medical attention,” Zonfrillo echoed. Time is important when it comes to treating dry and secondary drowning, he emphasized, and doctors will want to check and continuously monitor vital signs, get a chest X-ray and possibly provide acute interventions, like administering oxygen.

4. Thankfully, both types of drowning are relatively uncommon.

“These types of drowning only compose about 1 to 2 percent of all drowning incidents,” Zonfrillo said. “They’re equally scary, but extremely rare.” While it’s important that parents know what to look out for, he said he hopes news coverage (like this story) will not cause an undue sense of hysteria or worry.

5. There’s actually a lot parents can do.

Parents can play a huge role in preventing all types of drowning — typical, as well as secondary and dry — Zonfrillo said. Provide constant and targeted supervision when children are near open water, he recommended. “Know exactly who is watching [him or her],” Zonfrillo said. “Make sure you understand the child’s swimming skills, and keep in mind that drowning happens very quickly and not how it’s usually portrayed in the media — there’s not a lot of splashing, it happens very silently.”

Safety measures like pool gates and door alarms are important, echoed Maniaci, as is early enrollment in swim lessons. He said children under the age of 5 can be particularly vulnerable, because even if they know how to swim, they can become easily panicked if they swallow water. (Drowning is responsible for more deaths in kids age 4 and younger than any other cause except congenital anomalies, the CDC reports.)

“If I had a take-home point it would be that every child should have one adult responsible for what they’re doing,” Maniaci urged.