


April 3, 2019

March 16, 2019
February 13, 2019
February 10, 2019
January 26, 2019
January 15, 2019
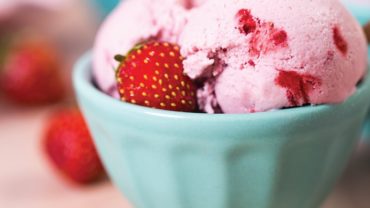
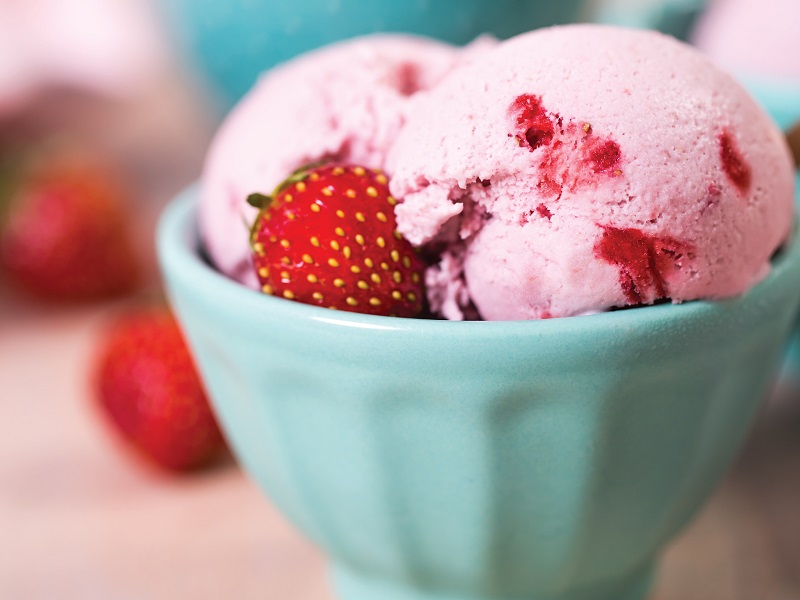
via Best Recipe Box: Making fresh ice cream doesn’t get easier than this. Smashed strawberries add so much fresh flavor and texture to this easy no churn, 3 ingredient ice cream strawberry ice cream recipe. All you need are a few ingredients, patience and an appetite for something cool and refreshing on a hot day.
Based off the popularity of our 3 ingredient creamy chocolate ice cream recipe, this strawberry counterpart has smashed fresh strawberries and a lot of love. Optional ingredients are a few drops of red food coloring if you want that extra pop of color. Without the food coloring, the ice cream is still super delicious and will be a favorite for years to come!
January 7, 2019

January 3, 2019
December 25, 2018
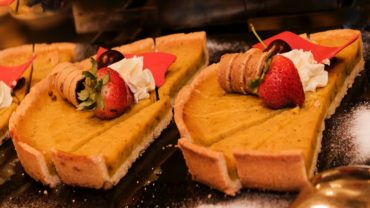
Classic pumpkin pie gets an update with a spiced pastry crust, a sprinkle of orange zest, and a dash of rum. Sometimes the slightest changes have great effect!
HOW TO AVOID BURNT PIE CRUST
I don’t know if you’re in this habit but tenting your crusts with tin foil for most of the bake drastically cuts down on singed edges. Just fold a long piece of foil in half lengthwise and gently wrap around the crust before baking. You can remove halfway through or so and allow the crust to get golden brown just as the center sets.
I Love pumpkin pie with a MASSIVE dollop of whipped cream, but for an all out stunner that’s really easy to make try topping your pie with a giant pile of meringue! If you want to know the secret to cutting this the key is buttering your knife. The fat cuts right through the meringue.
A FEW TIPS
- You can easily make the pie dough in a food processor with a few pulses but making it the old fashioned way is pretty fun, just a little more messy.
- Try warming the pie filling in a pot over medium low heat before adding to the pie shell. Make sure to stir constantly. Doing this will help the pie bake faster and more evenly.
- Feel free to adjust the spice profile and alcohol type/level to your liking.
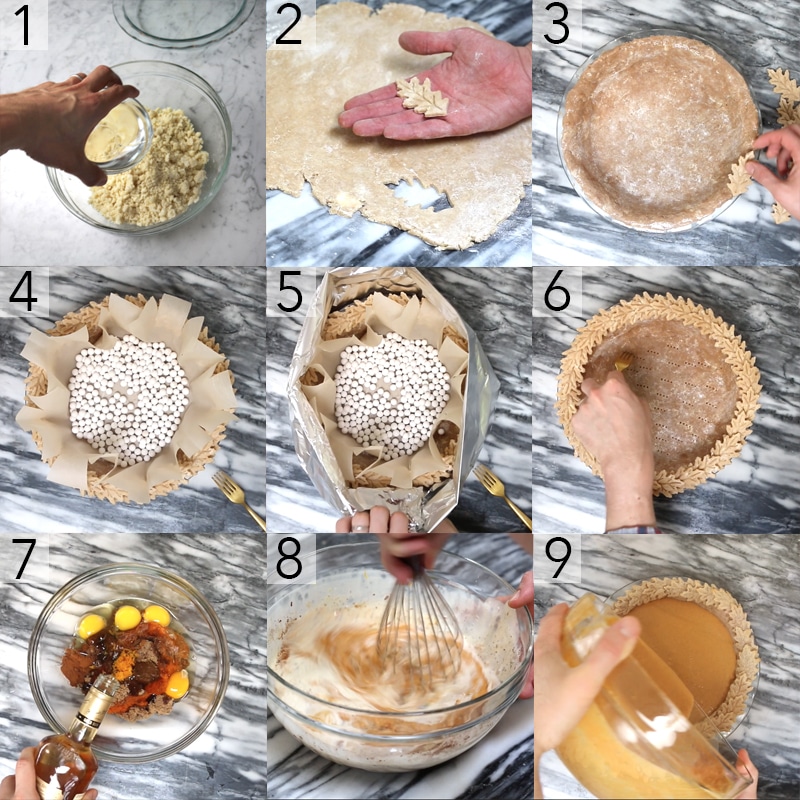
- In a large bowl, combine flour, sugar and salt. Add in spices. Whisk together. Grate in chilled butter and drizzle in ice cold water. Mix using a fork. Knead 3-4 times and shape into a disk.
- Wrap in plastic and chill for about 30 minutes. Divide dough in half and roll out. One half is for the pie’s base and the other is for the decorative leaves. I used a stamping pastry cutter for my leaves but any method is fine.
- Place your circle of dough onto the pie plate, trim the edge, and brush it with a bit of egg wash and place the leaves. I like to save a few leaves to place in the center. They bake quite quickly so keep an eye on them.
- Cover dough with parchment paper and place pie wights on top.
- Since the pie will be baking a while and I don’t want there do be singed edges I tent the pie with aluminum foil before baking at 425F for about 10 minutes.
- Poke the bottom and sides with a fork, add the foil back on and return to oven for about 5 minutes.
- Combine all the filling ingredients in a large bowl.
- Whisk together and I recommend transferring the filling into a pot and warming over low heat, stirring constantly. Adding warm pie fillings into an oven will let your pie bake quicker and more evenly.
- Add the warmed pie filling to your blind-baked shell reduce to 350F and bake until set.
December 21, 2018
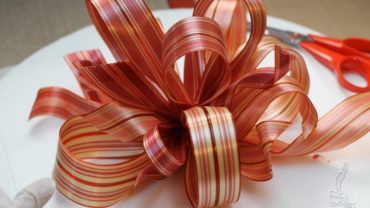
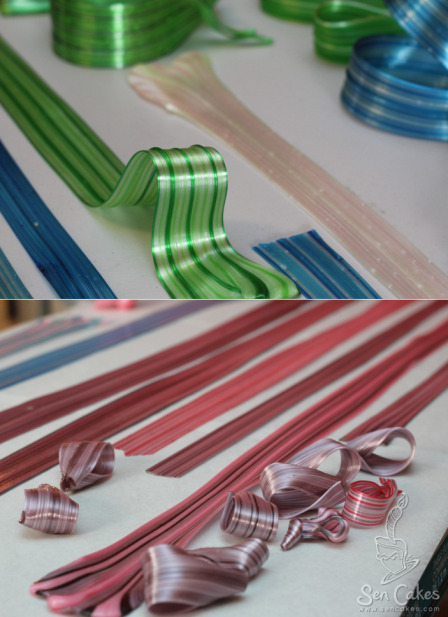
via rosesen: Recently, I made a goal to improve my sugar ribbon technique. The goal was to create sugar ribbons with thin stripes, satiny shine, and minimal grains. I wished to achieve this with sugar, not isomalt.
Over the course of 2 weeks, 8 batches of sugar, and over 40 pulled ribbons, some success:

Recipes:
For a basic recipe as a starting point, see Professional Baking by Wayne Gisslen, now available online on Google Books.
I compared numerous recipes using a spreadsheet. Recipes compared were from the following library books:
- Sucre d’art, by Stéphane Glacier
- Sugar Artistik, by Louise & Othmar Fassbind
- Professional Baking, by Wayne Gisslen
- The Advanced Professional Pastry Chef, by Bo Friberg
- The Art of the Confectioner, by Ewald Notter
- Plus various recipes from college
- The basic recipe contains granulated sugar, glucose, and acid. I found similarities and patterns are found in ratios, batch weight, and temperature.
The Effect of Temperature:
I noted in the books, final boiling temperatures varied from 300F to 340F.
Higher boiling temperatures result in:
- Better shine
- Better ability to hold shape and firmer consistency
- Required warming to a higher temp under the lamp to work with
- Increased force/energy to work with
- Increased yellowing/caramel colour
- The Effect of Time:My experiments resulted in inconsistent results in shorter vs. longer boiling time.
Perhaps boiling time affects the time the sugar is exposed to the acid, thus softening the sugar as time is increased.
On the other hand – longer boiling times also resulted in higher temperatures and less moisture, thus hardening the sugar.
The Effect of Acid:
For an in-depth look at the effect of acid on sugar, see this research article from the Center for Advanced Food Science and Technology, Korea University, “The Effect of Organic Acids on the Hygroscopity and Browning of Sugar Candies”
To summarize, acid inverts (also known as hydrolysis) sugar by acting as a catalyst, speeding up the split of sucrose (common granulated sugar), into glucose and fructose.
The effect of acid on pulled sugar art:
- Reduces crystallization
- Increases attraction to moisture/ stickiness
- Increases softness/fluidity and elasticity
- Darkens colour
- Glucose also prevents crystallization, as noted in the article.
Troubleshooting:
The challenge for me was determining the cause of grains.
In my trials, grains appeared immediately upon pulling the sugar, done shortly after boiling and cooling. This led me to believe the ingredients or recipes themselves were the factors.
From my research, there appear to be multiple possible causes of grains. This includes, but is not limited to:
- purity of the ingredients
- cleanliness of the equipment
- length of time the sugar is boiled
- temperature the acid is added
Batch upon batch resulted in grains. I tried to eliminate factors one by one. Frustration began to settle in and I really began to question. Were the textbooks fooling me? Were they leaving information out? Where the images photo shopped? Did their cameras have filters and lenses that only focused on the grain-free portions of the ribbon? Was isomalt used? Was the purity of the sugar, glucose or water itself the issue?
I began modifying recipes, which created interesting results:

When shaping, start with a minimum of 6 strands, and up to 10. I find 8 is ideal. 8 doubled up twice results in a ribbon with 32 strands. A finished 64-plus strand ribbon is possible, but may require a set of two hands because of the width.
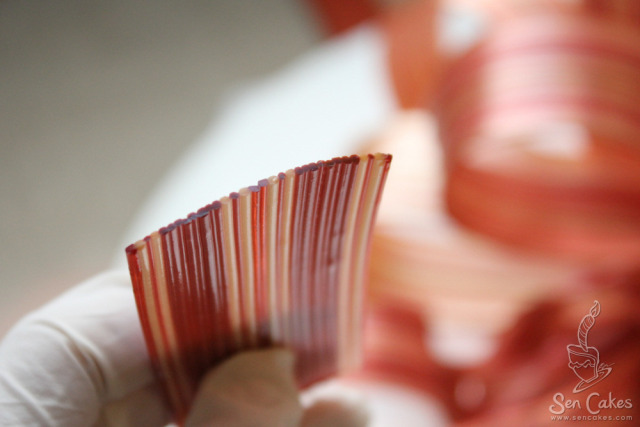
Start with strands even in size, shape and weight. Aerate just before forming strands.
The thinner the ribbon is pulled, the greater the shine:
Shine is also affected by:
- Proper aeration
- Quantity of acid
- Temperature the sugar is cooked to
- Storage and exposure to humidity
- Temperature the ribbon is pulled at
- There are unlimited possibilities in pulled sugar. For inspiration, check out Stéphane Klein, one of the greatest masters of sugar art of our time (warning: some images NSFW).