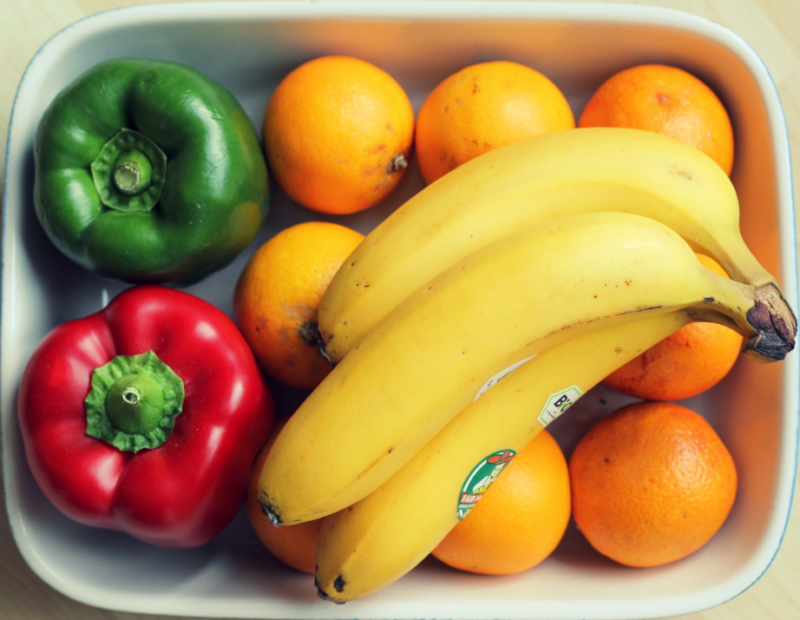
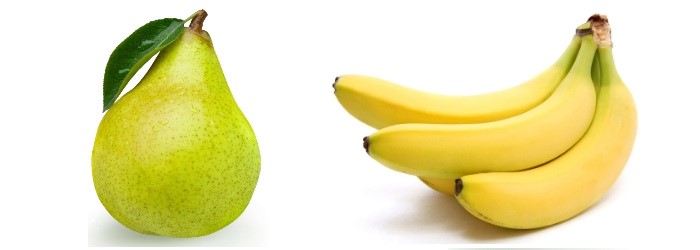
via BEYOND Fit Mom: An apple a day keeps the doctor away…but what about bananas?

Bananas are a highly nutritious, energy packed fruit, so including bananas in your children’s diet will help you to provide them many beneficial nutrients.

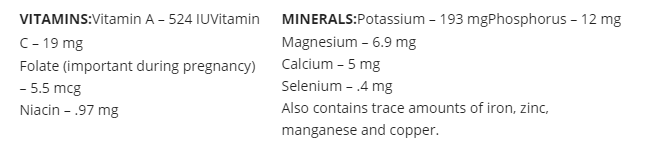
Bananas contain lots of nutrients including:

  • manganese
  • vitamin B6
  • vitamin C
  • fiber
  • Potassium
  • Iron
  • vitamin A
  • biotin

In addition, here are some surprising health benefits of bananas for kids.

Health Benefits of Bananas for Kids:

  1. Gives Kids Energy: Bananas are great for children who play sports or are highly active. The carbohydrates present in ripe bananas are fast digesting and give kids instant energy.
  2. Improves Digestion: In addition to increasing energy, bananas always improve digestion due to the fiber content. Bananas contain a type of fiber called pectin. This fiber is water soluble and aids in proper digestion by converting the carbohydrates into simple sugars that are released. Regular intake of bananas regulates the bowel moment of your child and prevents gastrointestinal problems.
  3. Strengthens Bones: Due to their high potassium content, bananas are also great for strengthening your child’s bones. The potassium neutralizes the sodium that may be present in your child’s diet and thereby makes your child’s bones strong. The calcium that is lost during urination can be supplemented by a banana.
  4. Improves Eyesight: Studies show that children who eat bananas regularly have better eyesight. Bananas can improve your child’s vision due to the vitamin A that is present. Vitamin A is known for protecting the retina from many kind of diseases.
  5. Boosts Brain Power: Research has shown that children who ate bananas at least 3 times a day performed in their exams. Potassium rich bananas help to boost brain power in children by helping the circulation of blood to the brain. Bananas can also increase your child’s concentration power. You may give them bananas for snacks at school or in between study hours.
  6. Prevents Anaemia: Iron deficiency, where there is absence of red blood cell production, leads to anemia. Your child’s diet should include iron, folic acid, vitamin B12 and copper in sufficient quantity for the formation of red blood cells. A banana is enriched enough with all of these nutrients and helps in producing hemoglobin. Iron is good for your child and prevents your child from getting anaemic.
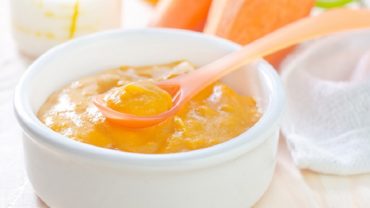
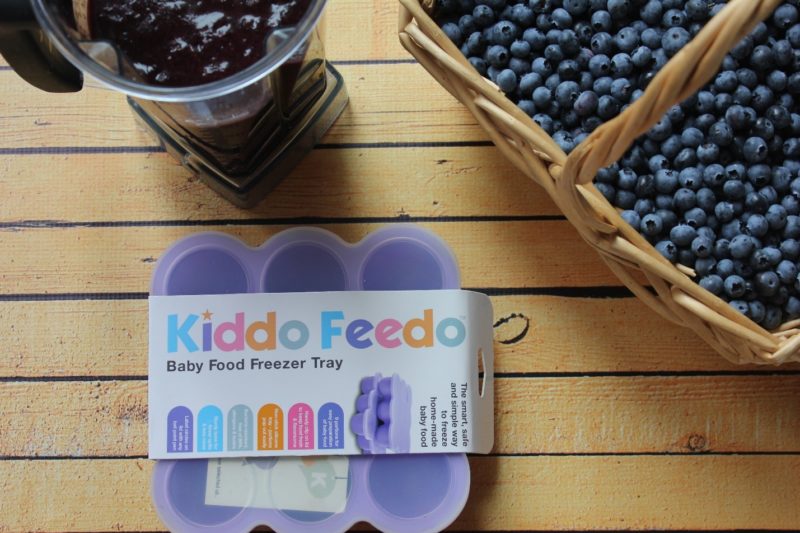
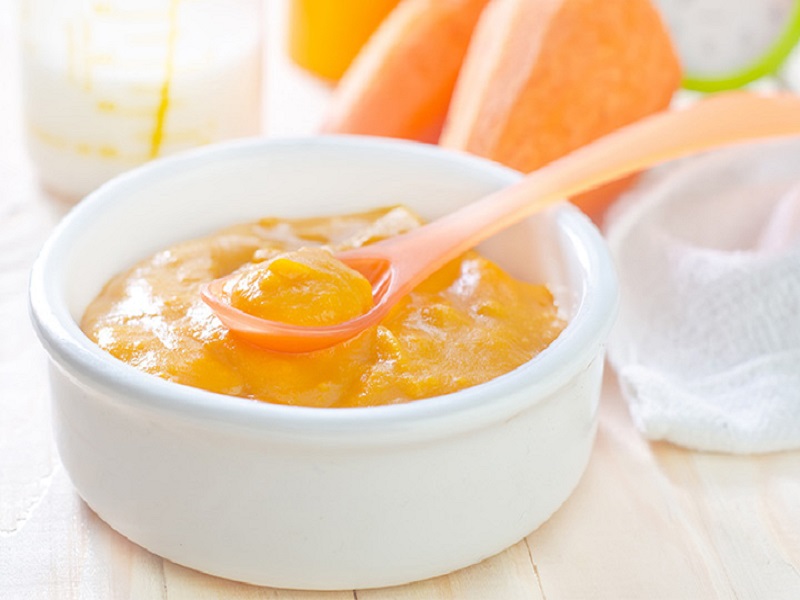
Baby’s First Food

Bananas are one of the the best solid food to introduce to infants. Bananas contain 0% fat, are easy to digest and are not allergenic.

Bananas can be introduced into your children’s diet from a very early stage, from about 6 months onward. Bananas can be a very nutritious baby food. You may introduce them by giving your baby mashed bananas with milk in small quantities. You can gradually increase the amount once you see how they tolerate it.


via Wholesome Babyfood: Did you know that the only difference between peaches and nectarines is the lack of fuzz on the nectarine skin. Nectarines tend to be smaller and more aromatic than peaches and have more red color on the fruit surface. (U.R.I. Horticultural School)

The Goodness of Peaches & Nectarines for Your Baby
Peaches are high in Vitamin C and Vitamin A and they contain a great amount of fiber. Peaches are known to have a diuretic affect and also are a natural laxative. Along with Prunes/Plums, the Peach is a great fruit to give to your baby if constipation has become a problem.

When can my baby have Peaches in baby food recipes?

Many pediatricians recommend that babies may begin to eat Peaches anywhere from 4 to 6 (six) months old. For those that start their babies on solid foods earlier than the recommended 6 months of age, peaches are an easy to digest first food for those between 4-6 months of age. Peaches are yummy, sweet and juicy. They pair well with a lot of other foods for baby such as chicken and bananas and avocado. Peaches may be poached, steamed or baked. Please be aware that Peaches tend to loose their nutritive value with prolonged cooking. Baking peaches or using a microwave to steam them may be the best choice of cooking for optimal nutrient retention. Peaches may be fed to your baby in pureed form alone or mixed into cereals, yogurts, and even in meats such as chicken. Frozen peach slices stuffed into a baby safe feeder are GREAT to help alleviate teething pain. Ripe peaches, or gently cooked peaches, may be diced into small cubes and fed to your baby as a Baby Finger Foods. If you find the dices are too slippery for baby to pick up, coat the dices with crushed and powdered Cheerios or with Wheat Germ. As always, we recommend that you consult with your pediatrician about introducing solid foods to your baby; generalities may not apply to all babies.

Nutrients in 1 medium sized peach – with skin

foods that are most highly contaminated with pesticides – purchasing organic is a smart choice. Once picked, a Peach or a Nectarine will not get any more sweet or ripe. A Peach or a Nectarine will however become softer and will also become more juicy. When selecting these fruits, you want to ensure that there are no cuts or bruising on the fruit. Purchase peaches and nectarines that are firm yet slightly yielding when gently pressed.

How to peel a Peach to Prepare for Baby Food
Step 1: Scrub fruit clean and carve an X into 1 side of the fruit Step 2: Place X side down in a pan with an inch of water Step 3: Bring water to a boil and steam until soft and tender Step 4: Allow the fruit to cool and then peel the skin from fruit – the skin should slip off very easily.

Tasty & Simple Peach Baby Food Recipes

Steam or Bake or Blanch Peaches for Making Baby’s Peach Puree

These methods work for nectarines, plums and pears as well. I HIGHLY recommend giving baked peaches a try at least once. You will find they are more tasty when baked. Why not try baking for all fruits?

Steam Peaches – Method 1

Step 1: Scrub fruit clean and carve an X into 1 side of the fruit

Step 2: Place X side down in a pan with an inch of water

Step 3: Bring water to a boil and steam until soft and tender

Step 4: Peel skin from fruit and remove pits and/or seeds

Step 5: move to step #6 below

Steam Peaches – Method 2

Step 1: Peel fruit

Step 2: Pit the peach

Step 3: Cut the peach into dices

Step 4: Steam until soft and tender then

Step 5: move to step #6

Bake

Step 1: Halve the fruit, pit and place “open” side down in a pan filled with 1 inch of water

Step 2: Bake at 400F until soft and tender and/or puckering of the skin appears.

Step 3: Peel skin from fruit and remove pits if you did not do so prior to baking (you may also leave the skin on your baked peaches – the skin may simply melt into the fruit.)

Step 4: move to step #6

“Blanch”

Step 1: Bring 3 or 4 cups of water to a rolling boil

Step 2: Add cleansed peaches or nectarines to the boiling water and boil the fruit for 3-5 minutes

Step 3: Remove fruit to a bowl of cold water, allow to cool for 2 minutes

Step 4: Slip off the skins and then take out the pit

Step 5: move to step #6

Moving to Step 6

Step 6: Reserve any left over water to use for thinning out the fruits

Step 7: Peel off skin if you have not done this already. Place fruit(s) into your choice of appliance for pureeing and begin pureeing.

Step 8: Add the reserved water as necessary to achieve a smooth, thin puree

Step 9: Add cereal (if desired) to thicken up.


via Health Ambition: Watermelon is surprisingly good for you and recent research is showing that eating this sweet tasting melon, and particularly drinking it as fresh juice, can have some significant health benefits.

Here’s 6 good reasons to eat more watermelon, or better still, make up watermelon juice with a simple instructions ahead.

1. Lycopene for Your Heart, Skin and Cancer Prevention
Lycopene is responsible for the beautiful red color of watermelon pulp. It is a powerful antioxidant, known to protect your cardiovascular system from free radical damage and studies have shown people who eat a lot of lycopene rich foods have a lower instance of heart disease.

Lycopene benefits also include protecting your skin from UV damage that can lead to photo aging, wrinkles and skin cancer. A big glass of watermelon juice before heading to the beach could provide a little extra antioxidant protection against ultraviolet light on your skin.

Research has even found a lower incidence of many other cancers with a higher intake of lycopene rich foods in the diet. This large meta-study of the protective effects of lycopene against cancer found evidence for a reduction of colon, stomach, prostate, pancreatic and lung cancer with higher lycopene intake from foods.

The simple takeaway is, if you’d like to help protect your heart, skin and body from cancer, then have more heathy lycopene foods like watermelon. Tomatoes are another great source, with guava and pink grapefruit also containing good levels of the antioxidant.

2. Citrulline for Better Blood Flow
The amino acid citrulline is found in particularly high amounts in watermelon juice. Citrulline can be converted in your body into arginine, an essential amino acid for improving blood flow and relaxing blood vessels.

This positive effect on your cardiovascular system can have some interesting health benefits, from relaxation when stressed, to more energy with better blood flow and reducing muscle soreness after exercise.

There has even been suggestions that the health benefits of watermelon juice could include a natural ‘Viagra’ like effect in the bedroom. For someone lacking in arginine in the diet, the high citrulline content of watermelon may just save them the prescription.

3. Weight Loss Benefits
The same amino acid citrulline that watermelon juice is so rich in, has also been shown in animal studies (due to its conversion to arginine) to interfere with the accumulation of fat in fat cells. It does this by blocking the effects of an enzyme called TNAP involved in fat storage.

Animal studies are hardly conclusive, but drinking a glass of watermelon juice before a meal is great for hydration, high in nutrition and very low in calories – all helpful for losing weight.

4. Anti-inflammatory Watermelon Juice
Eating watermelon or drinking the juice before heavy exercise can have an anti-inflammatory effect, according to this research. Watermelon is rich in flavonoids, carotenoids like lycopene and beta-carotene and other compounds that fight inflammation called triterpenoids.

All of these beneficial health nutrients increase the more you allow a watermelon to ripen. So once you buy them, make sure you let your melons ripen for a while and turn fully red before you eat or juice them.

5. Vitamins and Minerals
While perhaps not as impressive as its antioxidant carotenoids or unusual amino acid content, watermelons still contains useful levels of vitamins and minerals.

In the vitamins, watermelon is particularly high in vitamin C, as well as having more than enough beta-carotene that could be converted into vitamin A in your body if needed. There are also smaller amounts of B vitamins.

Potassium and magnesium are well represented in watermelon’s minerals, and particularly if you juice or blend it, the seeds contain good levels of iron and zinc.

6. Watermelon Juice for Kidney Health
Watermelon juice is great for your kidneys, having a highly cleansing effect when you drink it. It helps to flush out ammonia and uric acid and has even been known to help with kidney stones.

Watermelon seeds can have an even more pronounced effect on your kidneys, so it’s recommended to buy your watermelons with the seeds if you’re using the juice for kidney cleansing.

How to Make Watermelon Juice
To begin, scrub the outside of the watermelon you intend to use for juicing with a scrubbing brush and apple cider vinegar to remove any sprays or waxes.

Cut off a portion of the watermelon to juice, perhaps a quarter of a large one would be enough for 2 people. Sizes vary greatly though so go with your own judgment, remembering watermelon is over 90% water.

Chop up the watermelon, including the green skin and rind, into strips just thin enough to fit into your juicer feed. The rind is full of many of the beneficial nutrients detailed above so well worth including in juicing. With the sweetness of the red center you won’t taste it in your watermelon juice.

Here’s an interesting way to make watermelon juice in just 60 seconds!

Once you’ve chopped your watermelon into strips that can fit into your juicer, simply turn it on and slowly feed them through.
A good masticating juicer like this is far superior for making watermelon juice (and just about every other kind of freshly made juices as well, particularly green juices). Cheap centrifugal juices will generally have a very damp pulp after juicing, but a masticating juicer gets almost all of the goodness into your glass.

As soon as you’ve finished, drink your watermelon juice immediately for the best taste and the most health benefits. I hope you enjoy it. Your body certainly will.


via viaverdi: It’s time for dinner, your stomach rumbles and like any good pasta-lover, you decide to treat yourself and go to dinner at Bravo! When you arrive, you are immediately overcome with the aroma of Bolognese simmering for hours and hours to perfection, the scent of fresh-baked focaccia bread and the delightful sounds of families enjoying a meal together. You peruse the menu looking at all of the amazing Italian delicacies, but that little voice inside your head keeps whispering, “Lasagna, order lasagna!” And how can you argue with that voice? You give in, order Mama’s Lasagna Bolognese, and instantly feel satisfied with your wise decision. Hungry yet? As we pay homage to this incredible dish this week, we not only wanted to talk about how amazing lasagna is, but also look into the history of this delicious dish.

You may not know this, but technically, Lasagna did not originate in Italy as you may expect. Its origin can be traced way back to Ancient Greece. The name Lasagna, or “Lasagne” is derived from the Greek word ‘Laganon’; the first known form of pasta. Laganon was not a traditional lasagna as we know it with traditional Italian ingredients, but it was composed of layers of pasta and sauce. So it basically got its name from the method in which it was made, not for its ingredients.

Fast-forward a few centuries…Many countries have debated for years who came up with the first lasagna recipe. Of course, Italy claims they were the first, but really should be credited for perfecting the layers and layers of deliciousness that is lasagna. In fact, researchers in Britain found a cookbook with a lasagna recipe that dates back to the 1390’s, staking their claim to the first lasagna.

To recap, the name can be traced back to Ancient Greece, the first recipe to Britain and generations of perfecting the dish to Italy! Regardless of who can claim the lasagna fame, we are grateful to whoever is responsible for passing this recipe on through the centuries! MANGIA!


via Snack Girl: It took me about 10 minutes to make low sugar blueberry jam and my kids even less time to eat it.

Blueberries are literally rolling into supermarkets and farmer’s markets (and if you are lucky you can go to a farm and pick some). You don’t have to make quarts of jam to enjoy it. In this recipe, I make 1 ½ cups from one pint of blueberries.

At my local grocery store, they were selling 2 pints of blueberries for $3 (what?). This means my jam was less expensive than the jam you can find on the shelf. It was certainly healthier.

Also, you don’t have to “can” or “process” the jam. You can put it in the fridge and it will remain good for up to 3 weeks.

Ordinarily, jam uses sugar to help firm it up into that great thick consistency that we love. Ball came out with a wonderful product called Low or No-Sugar Needed Pectin that makes jam without sugar easy and delicious.

You can find it on Amazon and at hardware stores and supermarkets where they sell canning supplies.

I used it a few years ago in this post -Make Your Own Strawberry Jam (No Sugar Necessary) and have been wondering if it would work with blueberries.

Well it does! All you have to do is mash up the blueberries.

Then you heat with water and the no-sugar pectin and you have jam. I tasted mine after it came to a boil and decided to add one teaspoon of sugar (which is nothing in 1 ½ cups) to brighten the flavor.

It is amazing how little sugar you need to make something like fresh food taste wonderful.

If you want to make more, you will probably want to process the jars. Here is a pretty good YouTube video on canning:

I don’t have a canning jar rack. Instead, I use a set of tongs to lift the jars out of the water. It is easy once you get the hang of it.

Would you try this recipe?


via My Fussy Eater: As the school summer holidays loom here in the U.K., my thoughts have turned to “how on earth am I going to entertain the small person for an entire 6 weeks???”

Cue the planning of instagram worthy days out (will I ever learn that in reality our days out are never actually like this but instead always end with someone crying or needing first aid?!) and the crossing of fingers that it doesn’t rain for the entire six weeks!

With said days out planned I then start to tot up the cost and soon realise that days out with the small people can be really expensive, if on top of any entrance fees you might have to pay, you then have to add on lunch, drinks, treats and snacks so this summer where possible, I plan to take picnics on our days out to save some money and also avoid a last minute dash to the supermarket to buy all the sausage rolls in the land as soon as the sun makes an appearance!

Here’s my list of 25 of the Best Picnic Food for Kids!

Hidden Veggie Sausage Rolls

Delicious kid friendly sausage rolls packed with carrot and courgette. Everyone will love these Hidden Veggie Sausage Rolls!

Sweet Potato & Zucchini Healthy Strata Bake

If you’re looking for a way to increase the protein you’re giving the kids at either breakfast or lunch, this is the perfect way.

Broccoli & Cheese Frittata Fingers

These frittata fingers make the best finger food for baby led weaning and toddlers!

Avocado & Brown Rice Sushi Rolls

This recipe will have you making sushi in minutes. Best of all, it stores and transports really well, making it a great addition to kids’ lunch boxes and a great share plate at a picnic.

Child Friendly Hummus with Crudites

A child friendly hummus recipe served with crudites. Perfect as a snack or for summer picnics!

Apple Pie Yoghurt Dough Scrolls

Low in sugar and easy to make these apple pie yoghurt dough scrolls are a winner. Perfect for the lunchbox, they freeze well and are super portable. A sweet take on yoghurt dough!

Salmon, Cream Cheese & Spinach Pinwheels

Really easy to make and packed with nutritious ingredients, these Salmon Pinwheels make an excellent lunch for kids either at home or packed into a lunchbox!

Chocolate Chip Cookie Dough Hummus

Picnics, play dates, or a friend’s get-together can all benefit from a batch of chocolate-chip cookie dough hummus!

Mason Jar Italian Sausage Pasta

A delicious Italian Pasta Salad recipe made with Debbie & Andrew’s Sausages. Its super easy to make and can be easily stored in a mason jar for picnics and lunches!

Healthy Strawberry Banana Bread

A delicious and easy Strawberry Banana Bread recipe, made a little healthier with no refined sugar. The perfect afternoon snack for hungry kids!

Sweet Potato Frittata Fingers

For a delicious, filling and healthy lunch try these Sweet Potato Frittata Slices. Super easy to make and perfect for the whole family!

Healthy Strawberry & Chocolate Chip Blender Muffins

These Healthy Strawberry & Chocolate Chip Muffins are packed full of oats, banana, greek yogurt and honey and take just a couple of minutes to whip up in a blender or food processor.

Savoury Carrot Flapjacks

Delicious savoury flapjacks packed full of carrots, cheese, nuts and seeds. A really great healthy snack for kids!

Lunchbox Spanish Omelette

Looking for lunchbox ideas beyond sandwiches? Try this Spanish Omelette packed full of veggies. It’s delicious hot or cold!

Cheese & Chive Chickpea Dip

A creamy and cheesy dip made with chickpea and packed full of protein! A great way to get kids to eat their veggies!

Cheesy Puff Pastry Stars

So easy to make with just three ingredients both adults and kids will love these Cheesy Puff Pastry Stars.

Healthier Chocolate Chip Cookies

A healthier version of my kids’ favourite snack; Chocolate Chip Cookies! Made with wholemeal flour, oats and reduced sugar.

Macaroni Cheese Lunchbox Muffins

These Mac n Cheese Muffins (with peas!) are the perfect addition to a kids’ lunchbox.

Strawberry Cream Cheese Sandwich

A delicious and healthy lunch idea for kids. Wholemeal sandwiches filled with strawberries and cream cheese!

Spinach & Cheese Lunchbox Muffins

Delicious savoury muffins packed full of vegetables like spinach and peppers; perfect for a family lunch or a kids afternoon snack!

Kid-Friendly Pea Hummus

A quick and easy recipe for Pea Hummus. Makes a super healthy snack for kids and great for lunch boxes too.

Bacon, Cheese & Chive Egg Muffins

The whole family will love these delicious Egg Muffins packed with streaky bacon, cheddar cheese and chives!

Ham & Cheese Roll Ups

Delicious Ham & Cheese Roll Ups made with puff pastry. They make a lovely treat tea for the family or can even be eaten cold for lunch!

Healthy Apple & Banana Brownies

These delicious brownies are refined sugar free, instead sweetened with apple and banana and a little honey. They’re also packed with nutritious almonds and are gluten and dairy free!

Broccoli & Goats Cheese Muffins

Delicious and mild Broccoli & Goats Cheese Muffins, perfect for kids’ lunchboxes or to take out and about as a snack!


via keeeper: summer, sun, sunshine – the summer is ideal for a picnic. and the saying is: enjoyment to take away! whether in the park or meeting friends – you can’t go wrong with a couple of juicy blueberry muffins up your sleeve.

But take note, blueberries can give you the shock of your life: They are a very unforgiving berry and will quickly repay being handled incorrectly with a bitter taste. So that neither you nor your favourite berries end up sulking, we have our luca food storage containers in our range of products. luca not only truly understands berries, it also makes sure that your favourite berries are transported safely and stay fresh for longer. As a strong all-rounder it boasts further qualities that offer genuine added value both for on-the-go such as at picnics and for cooking at home.

luca – a food storage container with quality

A food storage container should keep the food fresh – after all, that’s its job! Our luca can do better than that: Thanks to its extra tabs it can be opened and closed with just one flick of the wrist, making life both outside at the picnic and at home in the kitchen much easier. When the going gets tough, our luca storage container keeps totally relaxed in both the heat and the cold: Temperatures from -20 °C to +100 °C can’t harm it.
So, no need to worry unnecessarily at the picnic, enjoyment is still the order of the day. With, for example, our yummy blueberry muffins. They’re not just super yummy, but they’re also super quick to conjure up. Why not try for yourself:


via Liv: We love going on picnics as a family. But this year, we decided to take it a step further and really make it into a fun outing by taking a bike ride to our picnic destination. And it’s become one of our favorite warm-weather outings.

We learned a few tips along the way that made it easier and more enjoyable; in case you’re thinking about packing up the family and food for your own picnic (I hope that you do!), here are some things that you may want to consider.

When to go

DO decide what you are looking for – a perfectly planned picnic with a day or two of prep, or a quick peanut butter & jelly sandwich and some fresh fruit before heading out. Both are great!

DON’T plan to go during the hottest hours of the day for two reasons: food spoilage and the whiny kid factor. I know you parents will thank me for this one.

DON’T forget to check the weather.

Where to go

DO pick a ride that’s suitable for your crew. Do you wish to take a long ride, or is the bike part just an appetizer for the main meal? Do you have younger riders, or experienced kids who can go the distance? Take all of these factors into consideration when making your decision.

DO pick a place that has public restrooms. Another one that I’m pretty sure you all will thank me for. Plus, restrooms are a handy place to rinse off your food storage containers before heading home.

What to pack

DO pack food in completely sealed containers. We like plastic containers that are completely leak-proof and ensure no unwanted liquids in your cooler.

DO bring finger foods that are easy to pick up and eat. But in the case that not everything is finger-friendly, DON’T forget to bring some reusable (or disposable) utensils.

DON’T bring food that needs to stay frozen or super cold. Or foods that could be squishy upon arrival.

DO freeze your water bottles before packing them. They can serve as ice packs to keep the food cold, and also be refreshing drinks upon arrival.

DON’T over pack. One of the best things about a picnic is that you enjoy the food while there, but don’t bring home a lot of leftovers.

DON’T forget the napkins. Bring extras in case of spills, or to wipe off/out utensils or containers if need be.

DO pack the baby wipes. These are incredible handy for messy hands, plates, etc.

DO pack the insect repellant if you are prone to pesky critters.

DO pack the sunscreen or apply before heading out the door. A sunburn post picnic can definitely put a negative spin on the outing for another time.

DON’T forget to pack a tablecloth if there will be picnic tables, or a blanket if you’ll be seated in the grass. We’re fans of covering up what other people leave behind on public picnic tables.

What to pack it in

DO think of your options with regards to riding. While a picnic basket is very picturesque, it’s not necessarily the most bike-friendly unless you have a rear rack that you could strap your basket onto.

DO consider backpacks for worry-free picnic transport. Just make sure to pack the heavier items on the bottom to avoid squished food.

DON’T hesitate to use multiple backpacks. I packed some of the heavier items in my backpack, but loaded up my kids’ packs with the utensils, a serving spoon, etc.

As some added inspiration, here is a sneak peek at a recipe from my 2nd book (coming soon!) that would make a great addition to your food lineup for your bike picnic:

CINNAMON-RAISIN QUICK BREAD

Difficulty: Easy
Prep Time: Less than 20 minutes
Bake Time: Less than 1 hour
Makes 1 loaf
Special tools needed: 5 x 9-inch loaf pan

1⁄2 cup (1 stick) butter, melted, plus more for greasing the pan
11⁄2 cups whole-wheat flour
11⁄2 teaspoons ground cinnamon
1 teaspoon baking soda
1⁄4 teaspoon baking powder
1⁄2 teaspoon salt
2 eggs
1 cup unsweetened applesauce
1⁄3 cup pure maple syrup
3⁄4 cup raisins

1. Preheat the oven to 325°F. Grease a loaf pan with butter and set aside.
2. In a large mixing bowl, whisk together the flour, cinnamon, baking soda, baking powder, and salt.
3. Using a fork, mix in the eggs, applesauce, melted butter, and syrup until well combined, taking care not to overmix. Gently fold in the raisins.
4. Spoon the batter into the prepared loaf pan. Bake until a skewer inserted into the center comes out clean, 45 to 55 minutes.

Slice the bread with a serrated bread knife. For a perfect picnic addition, add cream cheese and cut into bite-size sandwiches!


via Babykid CenterBlueberry not only is delicious but also contains a lot of nutrients. Though it ranks the second when compared to strawberries, blueberry is a common type. Thanks to having the antioxidants, blueberries are highly appreciated when mentioning to the fight against free-radicals.

It is noticed that mothers enjoy using it in the meals for kids. Consequently, the interesting problem is how to make blueberry baby food a quick and easy manner. Do you know this? Well, it’s here.

By What Means Can We Make Blueberry Baby Food?
In fact, we can combine it with a myriad of cuisines, your preferred dessert – blueberry cheesecakes, for example. Or even, cookies for breakfast or a piece to decorate the top your pizza is also a good idea. Obviously, there is incredible for meet everyone’s eating demands.

On the other hand, blueberry is the top choice of most parents, who have babies starting to eat the solids. In comparison with the baby cereals, this replacement is healthy.

Instead of purchasing it from the grocery, it believes that kids will prefer what you make yourself. By this way, you likely determine what the internal ingredients are and what objects are 100 percent of organic.

The Necessary Things

Fresh blueberry:

You can follow the majority of the people, who picks up the packaged items. However, it should know that you probably get the optimal nutrient and taste well if chosen to utilize the fresh blueberry.

Frequently, the canned fruits will have the high content of sugar. According to the nutrition experts, there are something parents should avoid using for babies, especially when they are under one-year-old.

Another worse one is to make babies become picky eaters when only eating the cuisines with sugar. Like that, it is not good for health.

Others Healthy Fruits & Ingredients:

It is necessary to balance the flavor. Instead of sugar, you are able to utilize pears, applesauce, or banana – the natural sweeteners. Once choosing to use these sweeteners, you do not need to find a lot of ingredients in order to make baby food have sweet.

In additional to that, it does not deny adding the nutritious ingredients as long as the kids can receive. Inevitably, the packaged fruits don’t have to be bad, but the best is to select the fresh kind.

Apart from the difference in the flavor, the shelf-life is also an issue, particularly, in case you plan to freeze, reheat, or enable the puree to thaw to serve in several days.

The Way to Make Blueberry Baby Puree
#1. It selects the precise kind and stores properly. It remembers to pick up organic when purchasing. If it sees bruises, you should not choose because they are easily squishy. The good blueberries are often deeply-colored – brilliant blue-shaded.

It must wash them before placing in your fridge. Then, it uses a bowl with a lid to place your blueberries. A bag/ case is also okay. If preferred, you likely put them in a freezer bag. Don’t forget to remove the excessive air before laying in your freezer.

Although the stored blueberries in the refrigerator have the shelf-life ~ two weeks and more, it recommends that you ought to utilize them as soon as possible.

#2. In fact, it probably utilizes blueberry in some of the manners. One of them is to make a natural yogurt. Simply, it only needs to mash them up. It is great when we do not have to add anything to it.

Do you plan to do this? Well, it requires your blueberries that are fresh from your freezer.

#3. If you want to make blueberry baby puree, you need to prepare a ½ cup of water and a cup of blueberries. It boils the water and remember to decrease the heat when adding the blueberry to here.

It takes about 15 minutes so that the blueberries are softer. If they are frozen before, the time will be more. Hence, it adds some nutrient fruits to your blender. It starts blending it and adds water as long as you recognize that your puree gets consistency.

#4. You can also add the baby oatmeal to your puree recipe. In case you want a variety of ingredients. It doesn’t know that you have recognized when making yourself, the recipe and ingredients are to spend on your need and your baby’s preference. You likely add any nutrient ingredients as long as they are healthy and serve right away when completing.

#5. If you want to use the puree for a long period of time, you should put them in the containers and place in the fridge. These containers must be BPA-free. It avoids using the normal plastic, which is not good for health.

Once storing in the fridge, the shelf-life will likely go for 3 days while it will be able to last up 3 months if put in the freezer. You just need to thaw it when you want to serve.

Final Thoughts
Aside from that, there are also other preferred recipes that you likely try, blueberry pancakes, custard, for example. In general, all they are the flexible ingredients, which are commonly utilized. It makes sure that the little kids will like your preparation.

Let’s experience fun in your own kitchen when making yourself the dish for your love baby. This is very convenient because not only you know the internal ingredients (it ensures the health) but also he/she can be changed the appetite regularly.

It hopes that this article is useful for those parents want to know how to make blueberry baby food at home. Happy take care for children enjoy!

Source: Babykid Center | How To Make Blueberry Baby Food Quickly And Easily


via verywellfit: White beans and rice-they just warm the soul. Kids are overjoyed when they find out this dish is for dinner. A super healthy meal that your kids love and request the recipe for is an amazing parent moment. And they truly are easy to make, you just need a bit of time and a pinch of patience for them to become tender and delicious.

Beans are a great source of protein and a good source of fiber, and even though they are inexpensive, through cooking, you transform them into an amazing meal for your family.

Start them in the morning on a weekend and let them cook away as you go about your day. We find it helpful to cook the brown rice while we are chopping and sautéing the vegetables, since we are standing at the stove anyway. This way, we can watch the water for the rice boil while already actively working at the stove, rather than having to do it later while the beans are on cruise control.

Another time saver is to chop your vegetables the day before cooking the white beans. Serve your beans with a salad and some fresh fruit, and you’ll have a fantastic meal that is sure to please the family. And since the cooked beans freeze well, you can freeze portions to use at a later date.

On the night prior to cooking your dried beans, you’ll want to sort, rinse, and soak them. Sort through the dried beans for rocks or other debris, then rinse the beans in cold water to remove any dirt. Put the beans into a bowl big enough to hold the beans once they have doubled in size, then add enough cold water to cover the beans by two inches. Allow the beans to soak overnight the night before cooking to start hydrating them.