
via Easy DIY: Here is a step by step procedure for making an Hippopotamus with paper. Easy DIY teaches you how to make creative paper crafts in an easy way. And also, these DIY crafts are easy to make for all age groups.
February 15, 2019


via Easy DIY: Here is a step by step procedure for making an Hippopotamus with paper. Easy DIY teaches you how to make creative paper crafts in an easy way. And also, these DIY crafts are easy to make for all age groups.
via All Kids: Our cotton ball sheep craft is a fun farm craft for your preschooler. We’ve found that combining cotton balls with a decent amount of glue makes for a very child pleasing craft, and this fuzzy sheep craft is a definite favorite. Even very young children will enjoy this craft as they get to experience the texture of the cotton balls and the joy of being able to do a large part of the craft “all by themselves”.
What you’ll need:
How to make your cotton ball sheep craft:
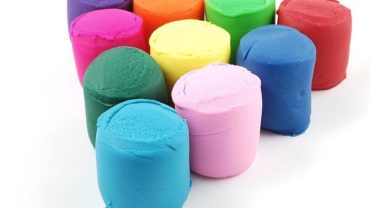
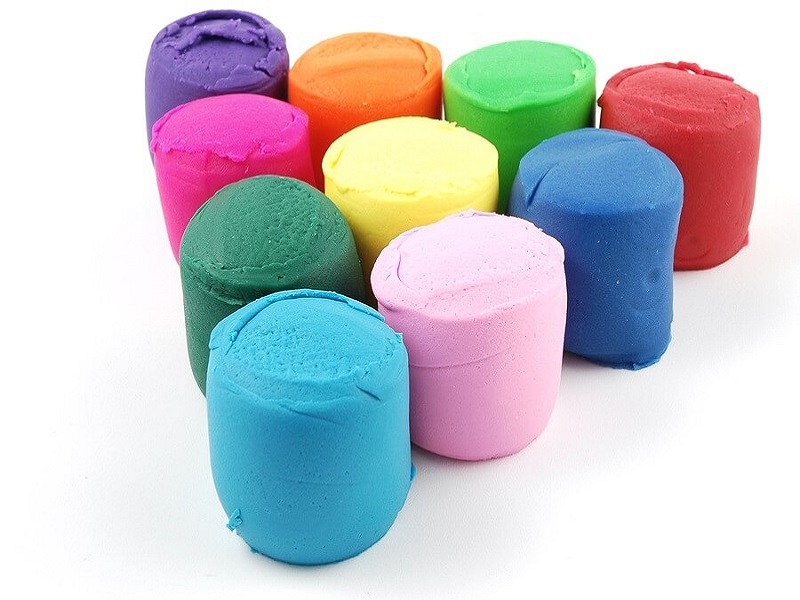
via familyeducation: Everyone seems to have a favorite playdough recipe, and many old favorites have been included here. Some require cooking and some don’t; some are meant to be eaten and some are not. Choose the recipe that best suits your needs and the ingredients you have on hand. Store playdough in a covered container or Ziploc bag. If it sweats a little, just add more flour. For sensory variety, use playdough warm or cool as well as at room temperature.
Colored Playdough
Materials
Directions
via Cosy Project: Between 10 and 15 per cent of the population is left-handed, and most tools, utensils and other industrial and household items are designed to suit right-handed users. We can’t help with kettles and power drills, but read on to find out how to embroider, sew, knit, crochet, cut and iron as a left-handed crafting guru.
Some stitches are worked the same with either hand: detached chain (lazy daisy) stitch, glove stitch, feather stitch and some others that are worked in vertical lines. Many stitches are simply flipped 180 degrees: a leftie begins lines of running stitch, backstitch or chain stitch at the left end of the line instead of the right. Stitches worked the other way, such as herringbone and blanket stitch, are worked right to left instead of left to right.
There might not be left-handed needles, but the twist in some threads determines how they should be worked, meaning that left-handers can’t simply mirror-reverse all the stitch diagrams. A few stitches even work better turned 90 degrees from the right-handed instructions — it’s complicated, isn’t it?
Embroidery guide for left-handers
Previous generations of lefties were just told to turn the book upside down, but this was simplistic and encouraged a clumsy, inefficient stitching action. Fortunately, there’s now some expert help available to guide them through the myriad embroidery stitches used in surface stitchery, counted thread and other styles of embroidery.
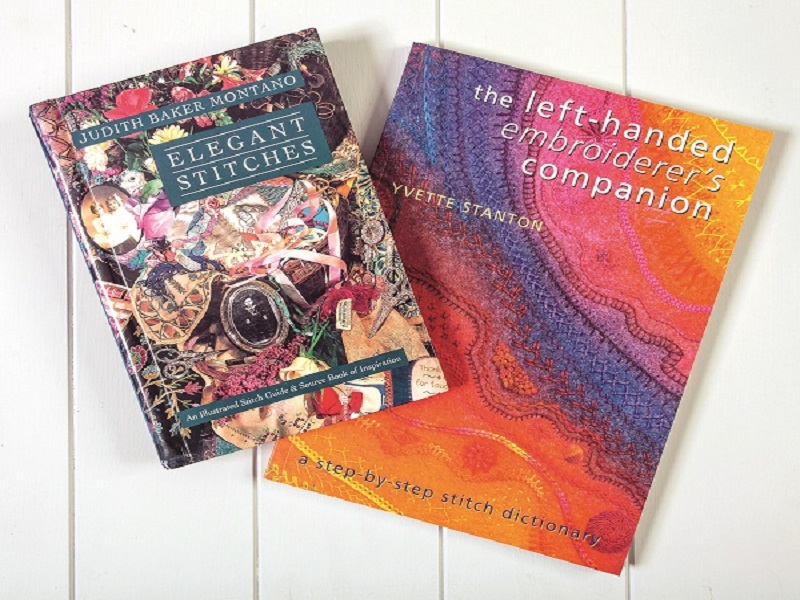
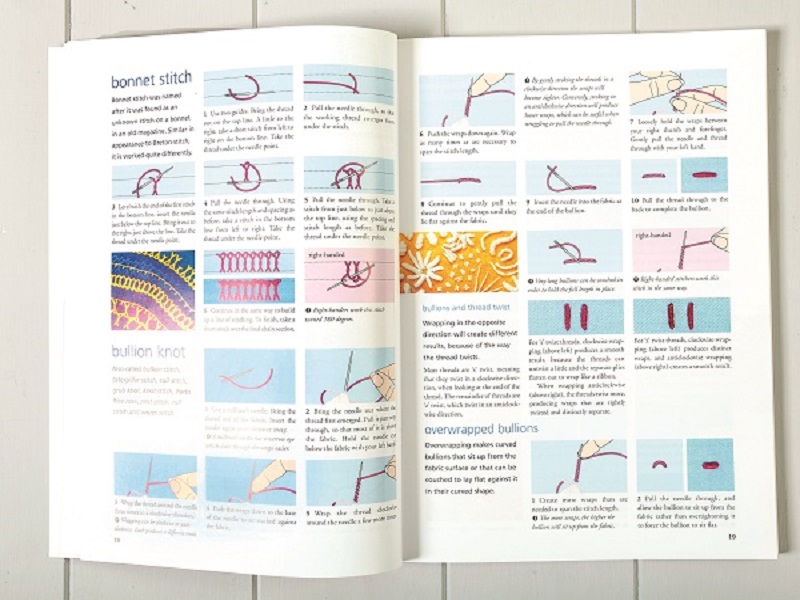
The Left-Handed Embroiderer’s Companion (2010) by Yvette Stanton is a comprehensive manual, depicting the stitches step by step in clear diagrams as well as in photographs with a brief description of the right-handed versions for reference. (She’s also published an equivalent book for right-handers – both are highly recommended. They are available from craft book stores or directly from Yvette.)
Judith Baker-Montano’s 1995 title, Elegant Stitches, has a chapter on left-handed stitches. She covers a good range of basic embroidery stitches with a particular emphasis on silk ribbon. The book is widely available in hardback and as an e-book.
Sewing
There are no left-handed sewing machines as such, but some are more user-friendly than others. Manipulating complicated controls or overly detailed touch screens can be difficult with your non-dominant hand or clumsy if you try to work across your body with your left hand. When you are shopping for a new machine, spend plenty of time trying out the controls on several different makes and models before making a decision.
Are sewing machines left-handed? It’s certainly true that some current industrial models as well as many early sewing machines require the needle to be threaded left to right and the bobbin to be loaded from the left. We haven’t been able to verify the reason for this, but it’s believed that one of the inventors of the sewing machine, Elias Howe, was himself a left-hander.
Knitting and crochet
Both hands play important roles in knitting, so many left-handers simply knit right-handed. It might also be because they were taught by their right-handed mothers or grandmothers. These days, you can view Youtube videos of nearly anything you want to learn, including excellent tuition in left-handed traditional and continental knitting styles.
Crochet is very different. It requires quite complicated manipulation of the hook with the working stitch and yarn while the non-working hand merely holds the yarn taut and supports the work. Ideally for crochet, one should learn from (and teach) a person of the same lateral dominance. Failing that, Youtube provides detailed step-by-step guidance. The low-tech alternative is to observe a right-hander crocheting in a mirror.
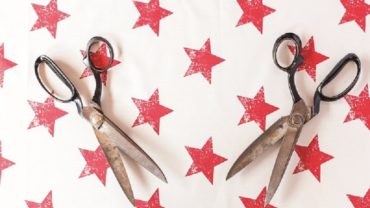
Cutting
Scissors
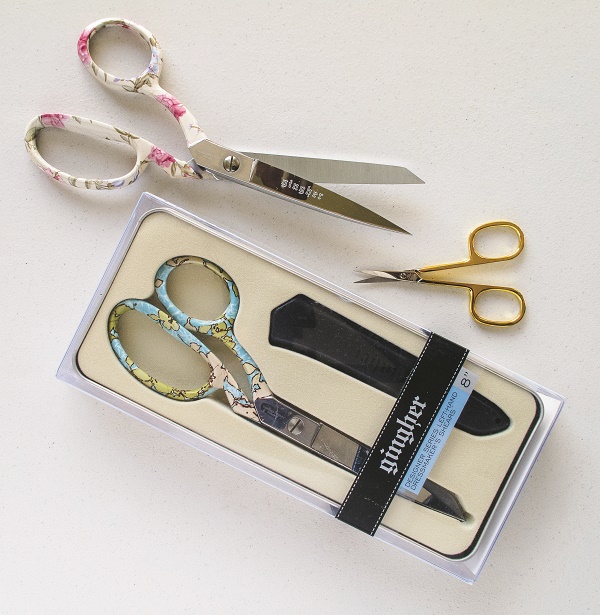
True left-handed scissors have the blades arranged differently from right-handed and ambidextrous scissors. Many scissors that are marketed as left-handed merely have the handles shaped accordingly, but the blades are arranged as for right-handed scissors. So-called ambidextrous scissors have neutral shaping on the handles with right-handed blades.
The main advantage of true left-handed scissors is that lefties can see the line they are cutting along. The upper blade of right-handed scissors conceals the line when they are used in the left hand, making for messy or inaccurate cutting. In addition, the action of left-handed blades is quite different from right-handed blades in your hand and if you’ve always used the latter, it might be quite hard to adapt. If you’ve got a left-handed child or grandchild, supply them with true left-handed scissors from their very first pair – their cutting will be better because they can see where they are going and the action will be more ergonomic for them.
True left-handed dressmaker’s scissors, embroidery and other specialist scissors, including ones for children, are available from scissor suppliers, but probably not from your local craft shop, nor in the broad range of styles, brands and colours available to right-handers.
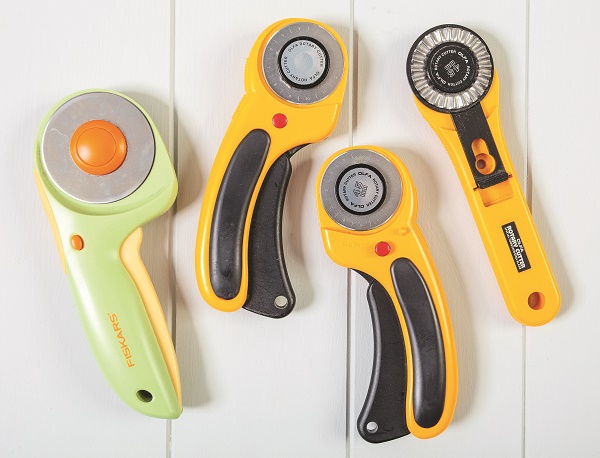
Rotary cutters
Many rotary cutters are symmetrical and work equally well in either hand while others are shaped to work in one hand only. Some of these, such as the Olfa deluxe and Fiskars models, are easily reassembled for left-handed use while the Martelli ergo cutters come in right- and left-handed versions. Of course, left-handers also need to arrange the fabric and ruler on their cutting board in reverse of right-handers — something to keep in mind if you are working from a photographic tutorial or in a class with a right-handed teacher.
Ergonomics
When you are setting up the various workstations in your craft room, think about the way you do things when arranging the relevant components. For example, position task lighting on your right when you are embroidering or quilting so you are not working in your own shadow.
Set up the ironing board to the left of the sewing machine for pressing patchwork seams as you go. If you are fitting out a studio from scratch, even the location of power outlets and switches can be optimised. If you work with pencils or paints and paper at the design stage, position the paper to the right of the equipment so you aren’t reaching across your work to pick up the eraser or wash a brush.
If you work digitally, you’d have the Wacom drawing tablet to the left of the keyboard. Many lefties also convert their mouse to work in their dominant hand. You can lessen the inconvenience and irritation of right-handed equipment with thoughtful planning and design.
Ironing
These days, most irons have the cord anchored at the centre, not at one side. Left-handers should avoid irons with side-mounted cords as they always get in the way and flex sharply, causing them to break down quickly. That said, it doesn’t mean that most irons suit either hand equally well. Like kettles, they may only have a water window on one side and the controls may favour right-handers too.
A basic ironing board is a symmetrical shape and can be turned either way, but most models with iron stands, cord holders or shaped legs are only suited to right-handers. The lever for collapsing the board or adjusting the height is also inconveniently located for a leftie. In a household of both dexterities, the ironing-board set-up can be a source of conflict. If you have the space, position the board at 90 degrees to the wall so that a user can stand at either side.
If you are considering the purchase of an ironing system (comprising a powerful steam-iron head connected to a boiler mounted in the board framework), examine it very carefully from a left-handed perspective before buying.
via treehugger:

A Fork Bracelet
The pleasures of giving and receiving handmade gifts are many. The headaches of handmaking handmade gifts are often even more. All too commonly our best-laid plans result in crafting till sunrise like deranged elves, attempting to pull off an assembly line of feel-good DIY presents that have us cursing like a sailor. Which is why we’ve come up with a list of sane homemade gifts that will allow you to actually enjoy the days leading up to Christmas. From elegant funky fork bracelets to bath bombs and candied kumquats, all of these gifts take less than an hour to make, but still have plenty of bang for the buck First up, a fork bracelet. With an old cheap fork and 4 minutes and 47 seconds, according to the video tutorial, you can make a fabulous bracelet. This Stars for Streetlights step-by-step shows you how to craft the classic.
Flower Powered Edibles
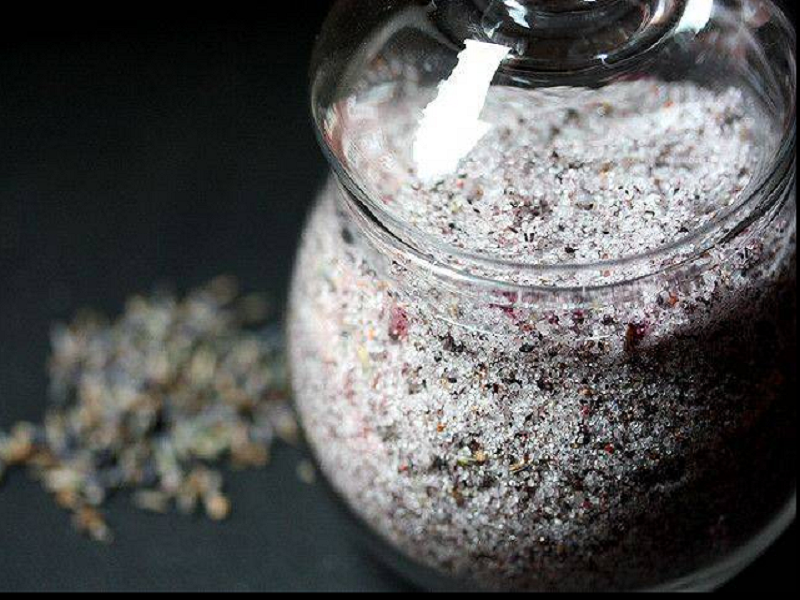
For those not in the northernmost climes, you may still have blooms in the garden. If so, Flower Petal Vodka, Flower Petal Sugar, and Flower Syrup are a few quick steps away.

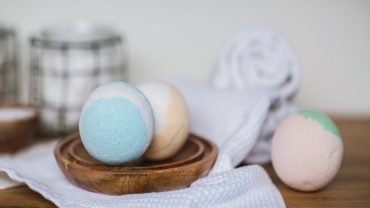
DIY Bath Bombs
Become your own chemist and create homemade bath bombs (variously called bath fizzes) in the home lab known as your kitchen. With a handful of ingredients you can give the gift of bubbly, crackling baths.

Candied Kunquats
Seasonal citrus in the winter is like a blast of sunshine. Since kumquats take to candying like a dream, make a jar of these teeny zingy oranges to brighten the plates and palates of friends in need of a splash of cheer.
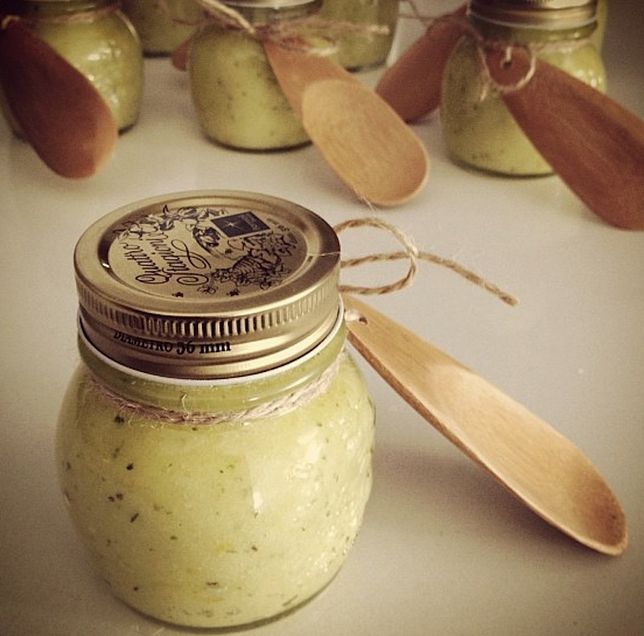
Salt or Sugar Body Scrub
Here’s the rub, so to speak: Commercial body scrubs cost an arm and a leg. Here’s the secret: They couldn’t be easier to make. Packaged in a recycled jar with a personalized label makes a super sweet (or salty) gift.
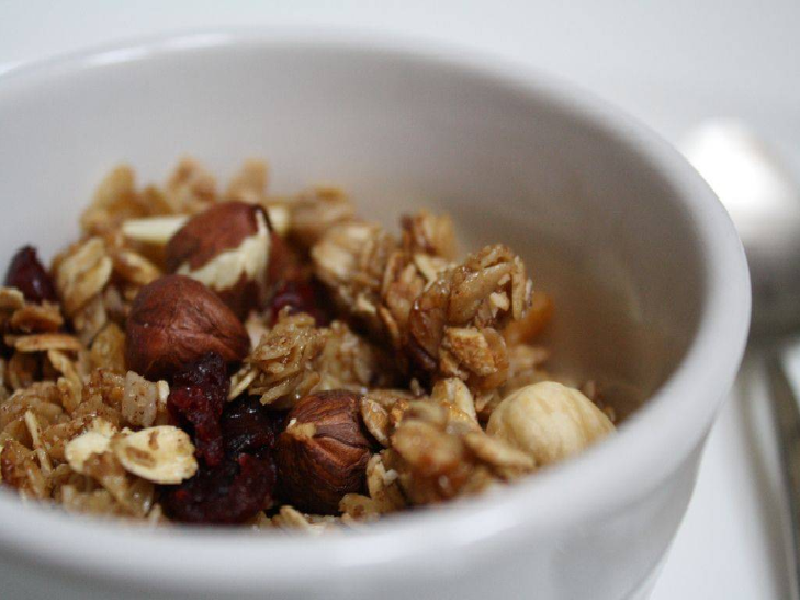
Homemade Granola
Since breakfast is the most important meal of the day and all, a big pretty bag of homemade granola is like a healthy investment in the days of your friends and family. This easy-to-make recipe is easily customizable, and looks sweet as cereal packaged in a ribboned, craft-paper bag or reusable canning jar with a homemade label.

Upcycled Sweater Coffee Cup Sleeve
If you’re quick with a pair of knitting needles, you can whip up a cozy sleeve to help your latte-loving friends avoid the extra cardboard slip from the coffee shop. But even better, if you have some old sweaters looking for a new lease on life, you can follow a tutorial like New Green Mama’s for the super quick directions. It can be as easy as cutting up a sweater sleeve and donning it with a bit of embellishment.
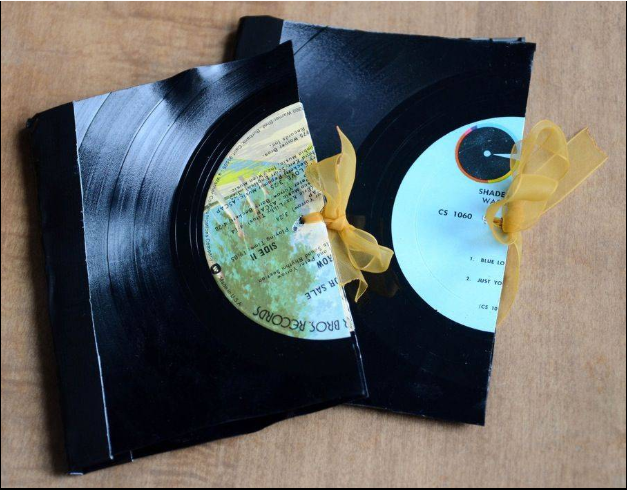
Vinyl Record Notebook
Old paper + old records = new notebook gift for vinyl fans.
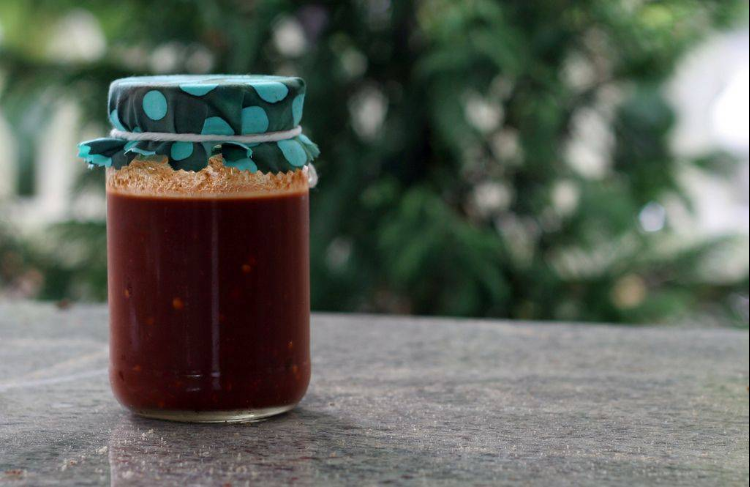
Homemade Hot Sauce
For your fiery friends, a little taste of the devil for Christmas? Homemade Tabasco-ish Sauce or Red Chili Oil both are easy to make, travel easily and keep well.
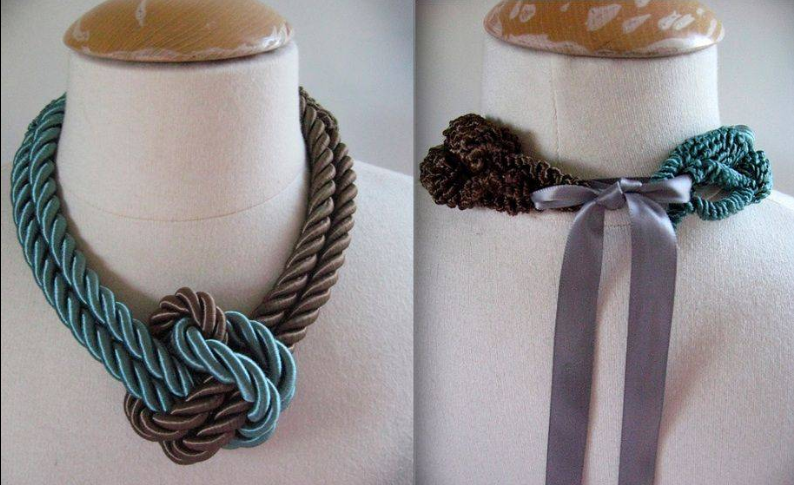
Rope Necklace
This is the perfect example of taking simple components and transforming them into something so much more dazzling than the sum of their parts. Take some cord and ribbon, and voila.
via Dabbles & Bubbles: We’re on the home stretch of summer now and you may be trying to find things to keep your kid’s minds (and fingers) busy. Have you considered sewing?
Kids are never too young when it comes to learning crafts, especially sewing. Sewing can not only bring hours of joy, it’s also a practical life skill. These fun sewing ideas will help kids learn and develop dexterity and coordination. I’ve been on the lookout for some cute things they can start off with and the projects I’ve gathered here range in difficulty from toddlers to teens.
Once kids learn any one of these fun sewing projects, who knows these might even spark their imagination to come up with their own creations. So go find a kid and get your sewing on!
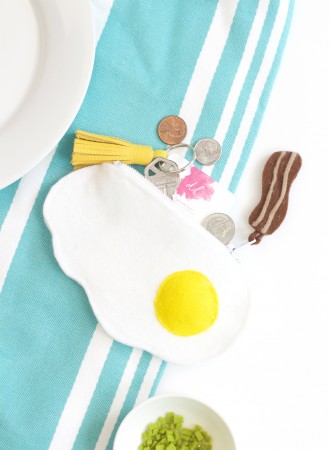
1. FRIED EGG FELT ZIPPER POUCH
In the ranks of cute foods, fried eggs are at the top of the list – so here they are, fried eggs in all their felty goodness. The DIY Fried Egg Felt Zipper Pouch is in full effect.
Via Damask love
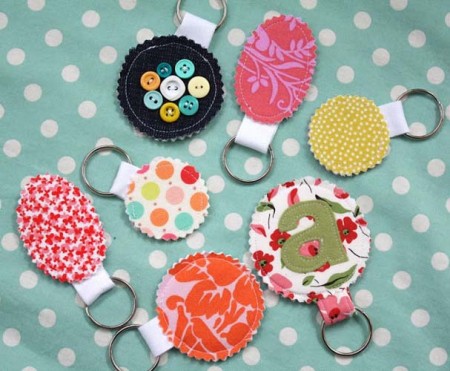
2. FABRIC SCRAP KEY CHAIN
Finally, you can get rid of your fabric scraps and teach your young ones to be crafty and resourceful, too.
Via Craftiness is not Optional
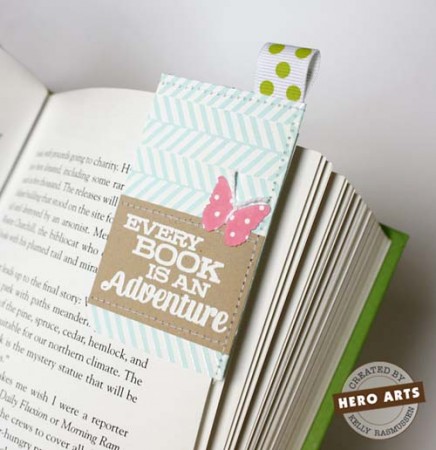
3. BOOK CORNER BOOKMARK
This lovely bookmark is for the older kids who might want to put a little spin on their own creations.
Via kr creations
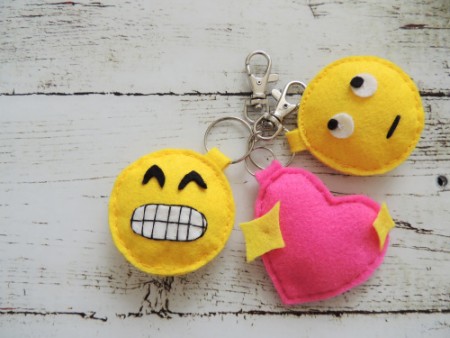
4. EMOJI KEYRINGS
Have you seen the hundreds of emoji pillows and products in the stores these days? Once your child makes one of these keyrings, they’ll want to make one for everyone in the neighborhood.
Via crafternoon cabaret club
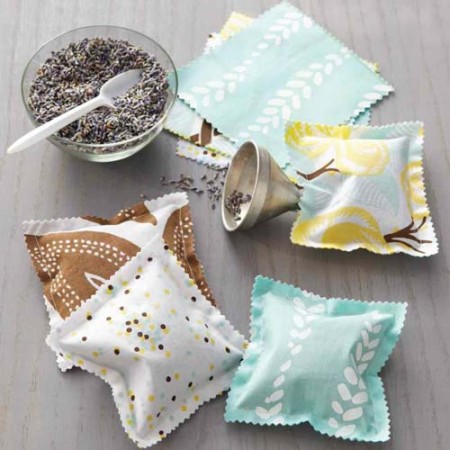
5. SCENTED SACHETS
These scented sachets will not only give your child something to do, these can also keep drawers and closets smell loads better.
Via Martha Stewart
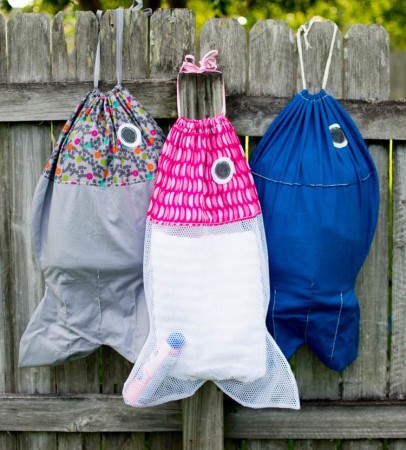
6. FISH LAUNDRY BAGS
Cute… check! Useful… check! Easy… check! These adorable Fish Laundry Bags will be the envy of all the other kids at camp.
Via she can sew
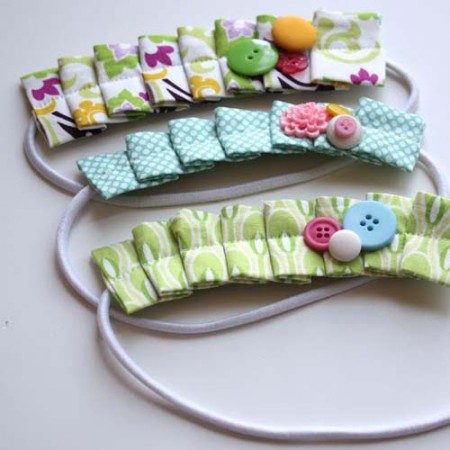
7. PLEATED HEADBAND
Kids will surely enjoy making their own combinations of fabric, buttons, and charms to make these lovely headbands.
Via Craftiness is not Optional
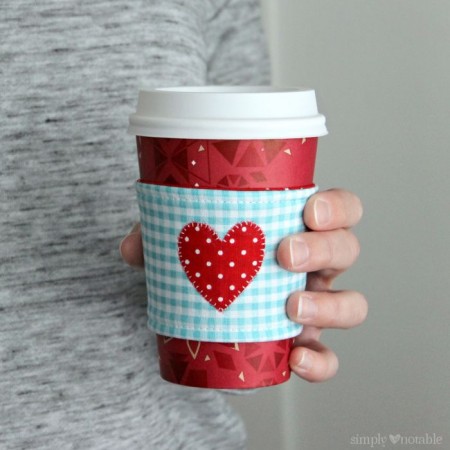
8. I HEART COFFEE COZY
Having a fabric cozy to take with me to get a hot beverage helps to keep the cardboard ones out of the dumpsters. Plus, it is super cute!
Via simply notable
9. KEYCHAIN CHAPSTICK HOLDER
For kids/teens who can’t live without their chapstick – these will keep them from losing them.
Via Crazy Little Projects

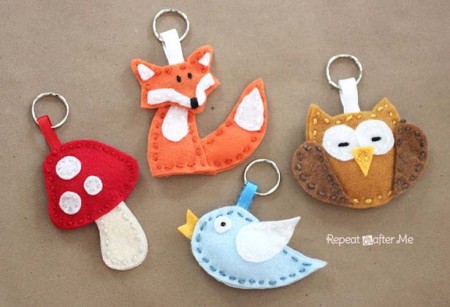
10. FELT FOREST FRIENDS KEYCHAINS
Kids can make their own little forest friend, hand sew and use on their bags.
Via Repeat Crafter Me
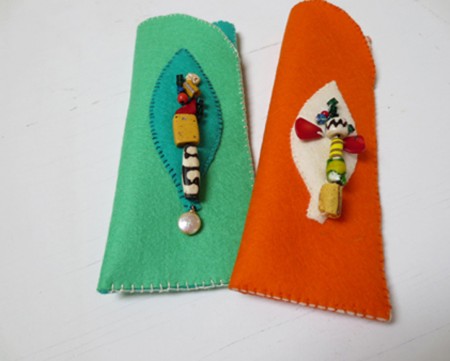
11. HANDSEWN BEADY EYEGLASS CASE
These would be perfect for kids to make for their grandparents, friends or themselves.
Via How To Sew.com
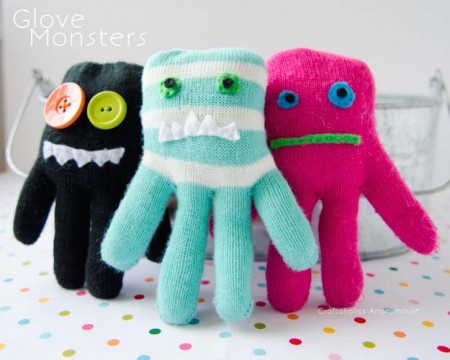
12. GLOVE MONSTERS
These cute glove monsters will surely be a hit for kids, they can make them as funny or scary as they like.
Via Craftaholics Anonymous
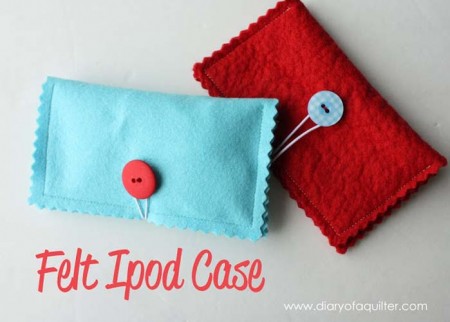
13. FELT IPOD CASE
Even young kids have smartphones now, so why not teach them how to better take care of their things by learning how to create a case.
Via Diary of a Quilter
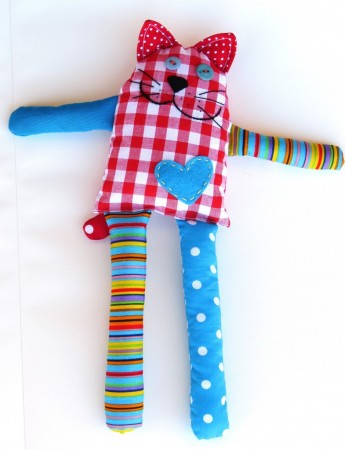
14. CAREFREE CAT FROM SCRAPS
When you start combining pieces of fabric and sewing them together, the toy starts to create its own character…just like this super carefree cat made from fabric scraps.
Via Sew Toy
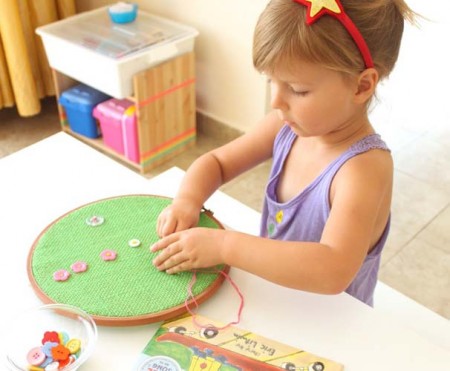
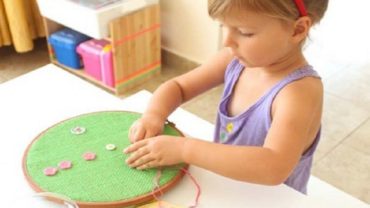
15. BUTTON SEWING
Button sewing is the easiest thing to teach young kids – just use a blunt needle and burlap.
Via Mama.Papa.Bubba
I hope these sewing ideas for kids will give you parents the chance to widen your kids’ horizons and teach them a skill or two. If you have other fun and easy sewing ideas that you would like to share with us, please do so in the comments.
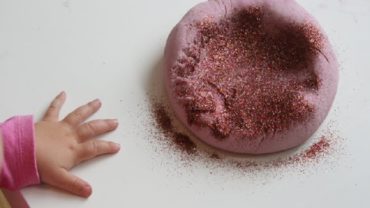
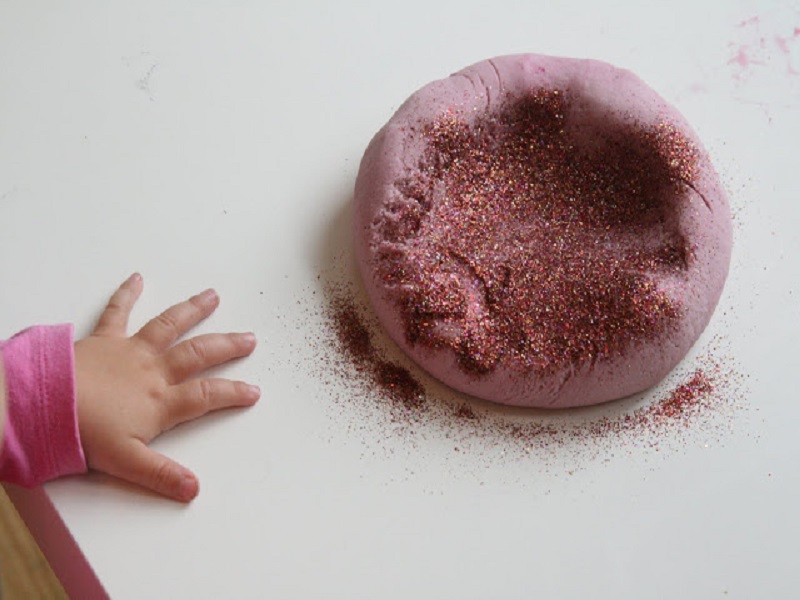
via the imagination tree: After we made the natural food colouring this week I wanted to try out using the blueberry one to dye some homemade playdough. It turned out a beautiful raspberry pink colour and smelt lovely and fruity!
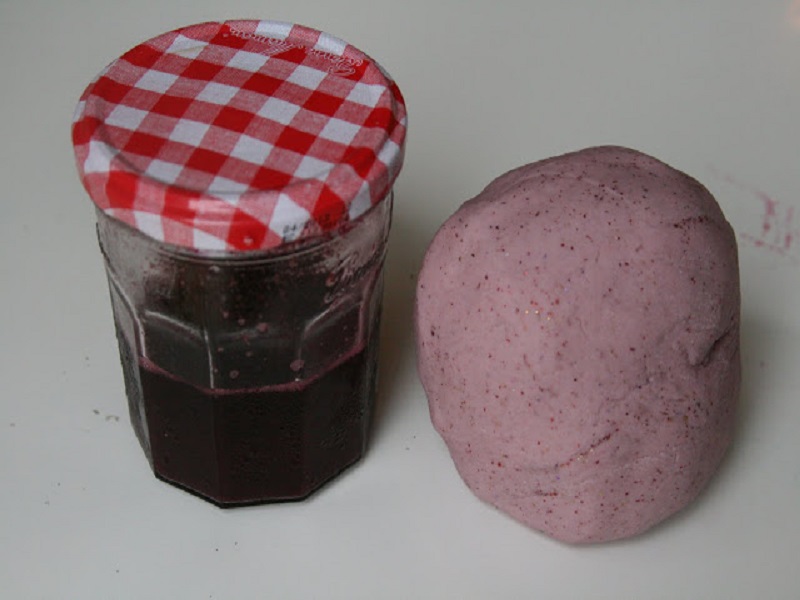
We added some red glitter to make it sparkly and even more appealing. We have a bit of a thing for glitter, as you may have noticed!
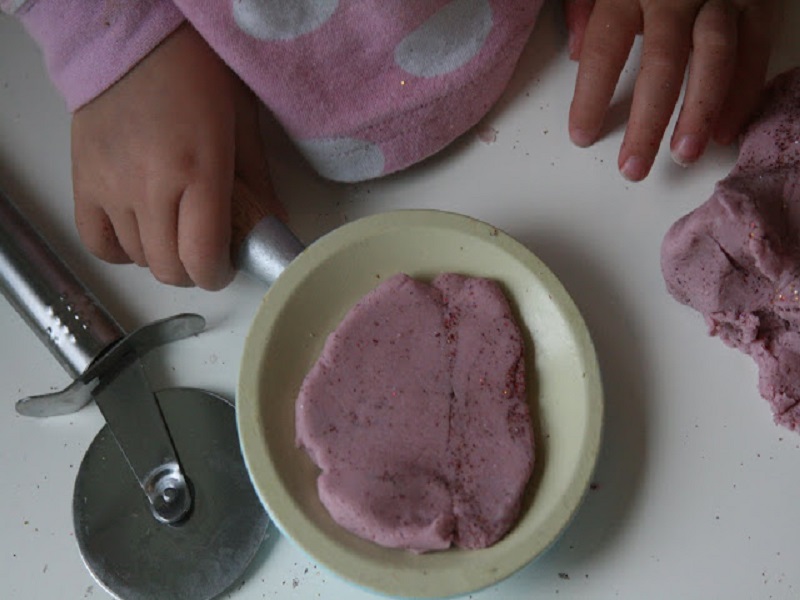
They made some blueberry pancakes in a little pan and chopped them up with a (blunt) pizza cutter.
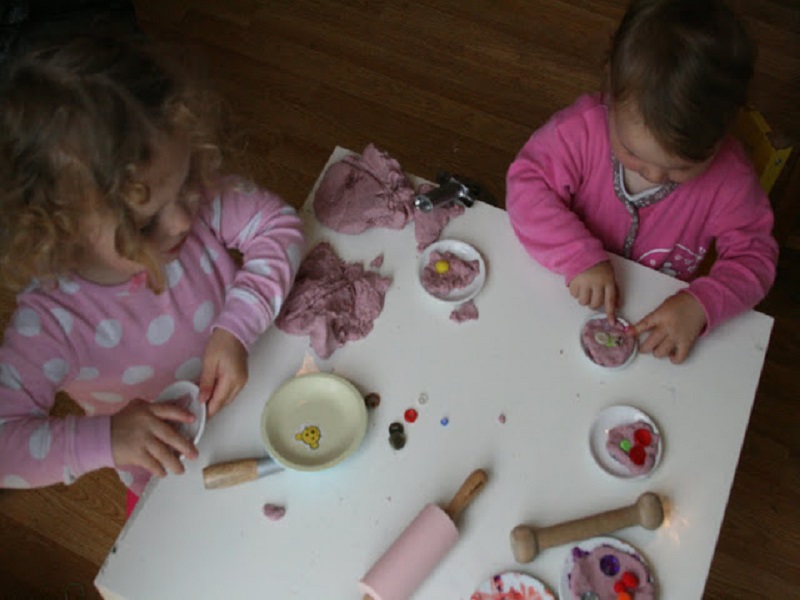
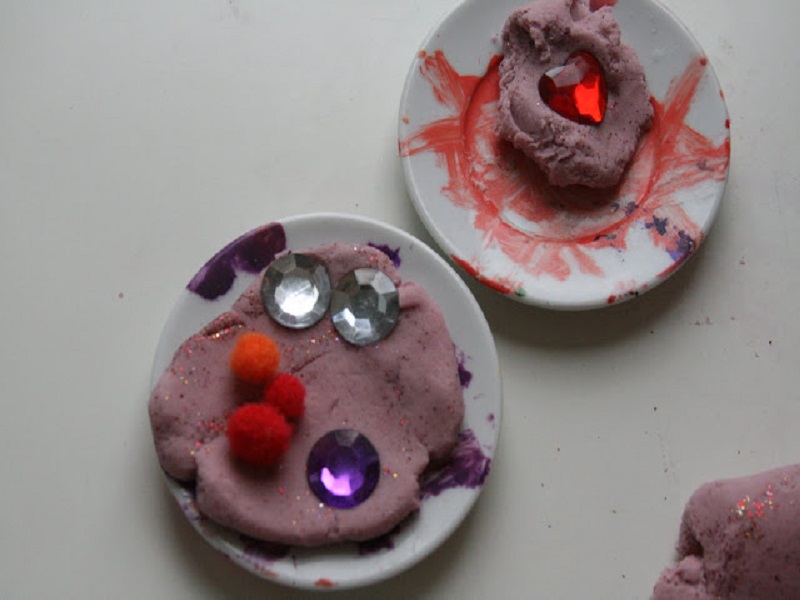
And then they set to work decorating them with beads, buttons and gems. Delicious!
I had to really fiddle with the recipe to make sure it wasn’t too sticky because of using a fruit juice-based colouring. These are the quantities I ended up with, which seemed to work well eventually!
Mix together vigorously and then knead until all lumps have gone. This should take a few minutes. If too sticky add a little more flour, 1/4 of a cup at a time. If too dry add another teaspoon of oil. Experiment!
Learning Links:
via Easy Peasy And Fun: Are you ready for shark week? We’ve been gearing up and that’s why we have collected 25+ most awesome shark crafts and activities for kids (and big kids) to make in days to come (or all year round, as these fierce fishes are fun all year round)!
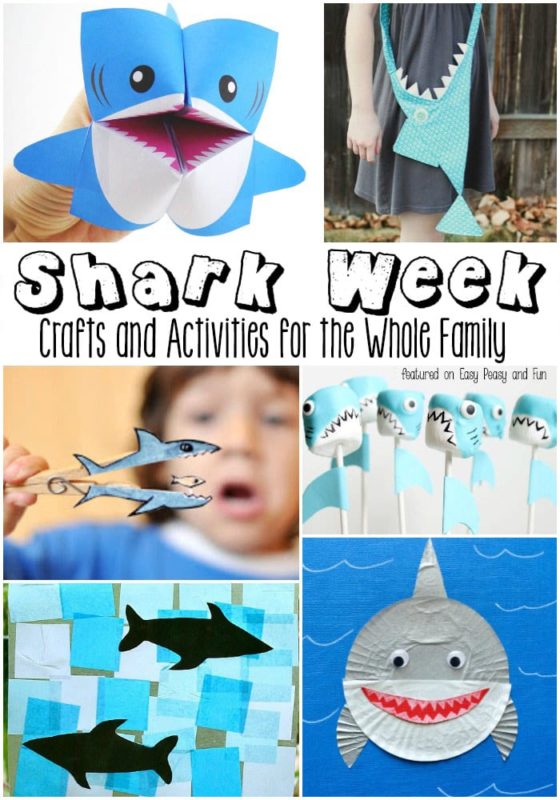
You’ll find a ton of activities for all ages – for the somewhat clumsy hands of toddlers and preschoolers, through the more crafty kindergartners, kids in grade school and even a few that you will totally enjoy!
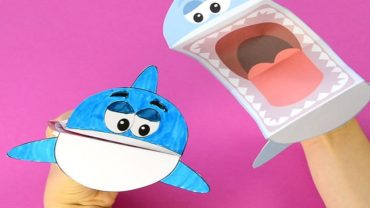
Funky Shark Puppet
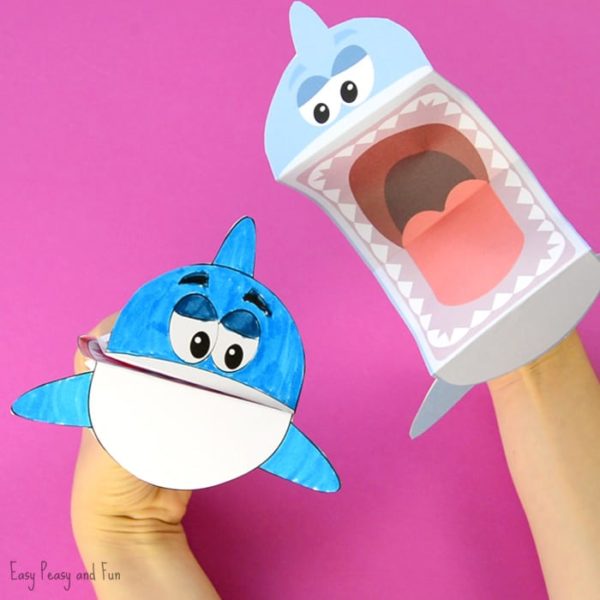
This one is insanely easy to assemble and we have both the colored and black and white version kids can color. These have been a huge hit in preschool and kindergarten, a fun project to do along with the Baby Shark song.
Surprise Big Mouth Shark Printable Paper Craft for Kids
This is such a cool little paper toy! Draw the details, color the desing, fold and play.
Shark corner bookmark
Just a few simple folds and you will make your very own little bookmark.
More Shark Crafts and Activities for Kids Just in Time for Shark Week
1. Let’s start with something I’m sure you made as a kid, just in different form – lets make a shark cootie catcher. Easy Peasy and Fun
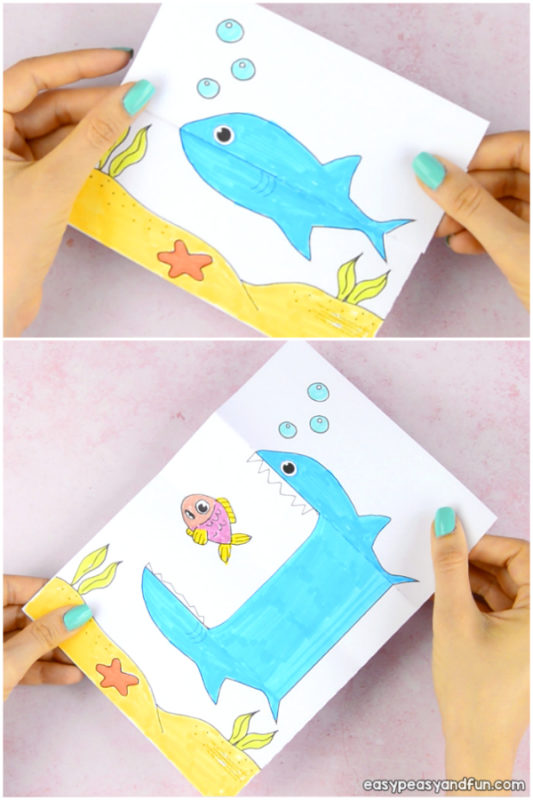
2. This lovely shark craft is a must do for shark week.
3. Have a preschooler at home or a kindergartner? They are going to love this easy cupcake liner shark. I heart Crafty Things
4. This shark sensory bottle will keep your toddlers busy for a while (and you can have the big brother or big sister make it). Stir The Wonder
5. We love a good game and to celebrate shark week we’ll be playing this matching pairs game all week! MollyMoo Crafts
6. Sunny day? Make a shark suncatcher! It’s adorable! Buggy and Buddy
7. Like to craft with paper plates? Make this rocking paper plate craft! Artsy Momma
8. As back to school is also “the thing” why not make a fierce pencil holder. Craft Klatch
9. Just want to learn more about sharks? You’re going to love these resources. The Natural Homeschool
10. Toddlers and preschoolers like to make footprint and handprint art so they are going to love this footprint craft. Glued to My Crafts
Shark Week Madness
11. If you’re thinking of making some treats with your kids this adorable and easy to make marshmallow pops are a must!
12. Or make this wiggly shark snack. The Joys of Boys
13. I scream for ice cream sandwich. Reading Confetti
14. You can also make shark jell-o snacks! Artsy Momma
15. Love I spy games? Then print this printable shark I spy game! Simple Fun for Kids
16. Working on fine motor skills? Give this fun game a try! School Time Snippets
17. Another clever idea is to turn golf balls into sharks! How fun is that? Craft Klatch
18. Go crazy with the duct tape and make this awesome craft. Naturally Educational
19. Another lovely sensory experience – make a shark sensory water bin. 3 Dinosaurs
20. If you or your kids are into simple sewing project you must play around with this funky shark purse.
21. You can also make a pretty fierce looking jewelry holder (or a wall decor). Creative Green Living
22. Re-purpose old washcloths and make a shark puppet! So You Think You’re Crafty
23. How about playing around with an actual shark tooth (a fossil one to add to the fun)? Check out how to make a stunning shark tooth necklace! Fall for DIY
24. Or make a pack of absolutely awesome yet scary looking DIY coasters! Perfect for a shark week party! Craft Klatch
25. I’ve been loving the clothespin crafts lately and this shark clothespin is a must make project. Estefi Machado
26. Lastly a fun project for all ages – make a pair of shark socks! Dollar Store Crafts
via lookwerelearning: Is there anything on earth better than chocolate? *thinks for a minute*
Yeah, I’d have to say no.
So when it comes to making learning fun, I love the idea of adding chocolate to the mix!
I thought these fun chocolate craft ideas and activities for kids would be a neat way to give winter learning a little “sweetness”, so I’ve rounded up 25 different resources below that kids (and their parents) will love! There are chocolate crafts, chocolate sensory play ideas, chocolate-themed printables, and even chocolate science experiments below to explore!
Want even more chocolate learning fun? Don’t miss our list of Charlie and the Chocolate Factory craft ideas that go wonderfully with the book or the movie!
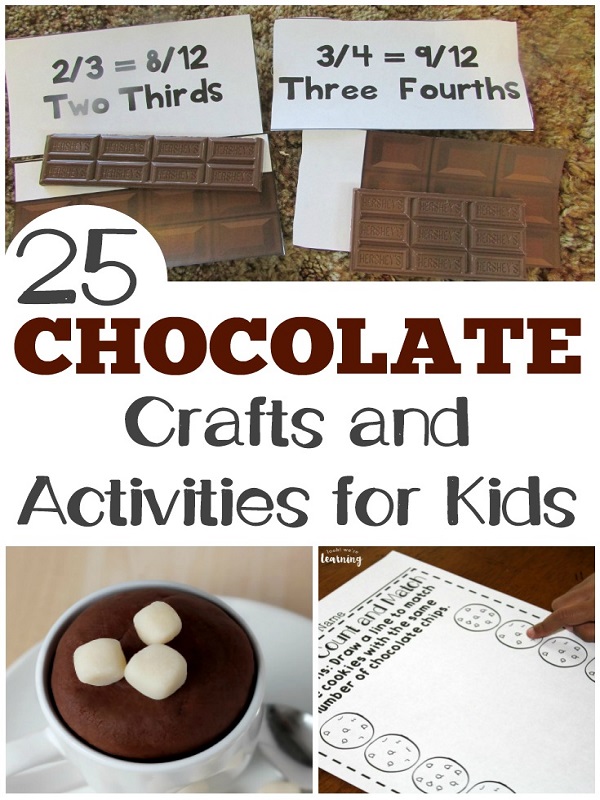
1. Pick up some free Chocolate Notebooking Pages for the kids!
2. Combine snacks with science experiments in this fun Hot Chocolate Science activity!
3. This adorable Cookie Jar Number Matching printable is so cute for chocolate chip cookie lovers!
4. The kids will love exploring the touch and smell of this No-Cook Chocolate Playdough!
5. Even toddlers can make art with this easy Edible Chocolate Paint!
6. This Pom-Pom Hot Cocoa Mug Craft is just too adorable!
7. Kids will get a kick out of eating these Snowy Chocolate Pinecone Snacks. They actually look like pinecones!
8. Let the little ones make their own cocoa with this DIY Hot Chocolate Bar!
9. This simple Puffy Paint Chocolate Chip Cookie Craft is a fun art project to try!
10. We’ve made oobleck before, but I’ve got to give this Chocolate Oobleck a try!
11. Get some early math practice with this Hot Chocolate Ten Frame Addition printable!
12. Introduce the kids to engineering with these easy Hot Chocolate Marshmallow Sculptures!
13. Grab these Charlie and the Chocolate Factory Notebooking Printables to complete as you read the book!
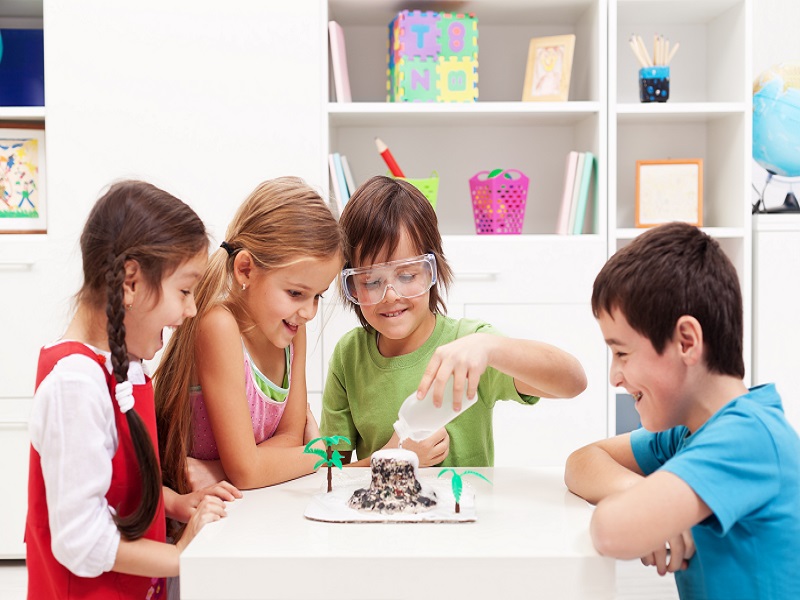
via Little Bins for Little Hands: Celebrate with science is our motto around here! Not a holiday passes without some sort of special science activity or homemade slime theme! we have 4th of July science activities that double as awesome simple chemistry activities too! Plus a few more surprises too! Homemade science and STEM make any celebration a real event!
4TH OF JULY SCIENCE ACTIVITIES FOR KIDS

Kids love theme science activities and experiments…
The novelty of the colors and accessories turns the holiday prep into something extra special. Especially if you love fireworks, parades, and fairs like we do!
Explore chemistry through different kinds of reactions including baking soda and vinegar experiments, alka seltzer activities, candy science, and of course our slime recipes!
Let me know what else you would add to the fun…
Share science activities with kids this summer! It’s a joy to watch their minds light up as they experiment with new materials. Join our 100 days of summer STEM activities for week to week themes!
Our 4th of July science activities make a perfect theme week for the 4th! Use our FREE printable planner below to get started.
4TH OF JULY SLIME
4th of July Slime is simple to make with our easiest slime recipe ever! Slime is cool science and sensory play for kids of all ages. Adults too! Or try this fourth of July fluffy slime!
4TH OF JULY ICE MELT
A 4th of July Ice Melt is perfect for a hot summer day and it can even be taken outside. Although we love ice melting activities all year round!
FIZZING FROZEN STARS
Fizzing Stars is a fun melting science activity and fizzy eruption all in one with a 4th of July star theme!
4TH OF JULY THEMED ERUPTIONS
4th of July Cookie Cutter Baking Soda Science has to be one of the quickest and easiest science activities ever! Plus you can set it up with so many different themes all year long like Halloween, Christmas, or Valentine’s Day!
BUILDING INDEPENDENCE DAY STRUCTURES
Independence Day Structures tests your STEM skills with designing and building your own stable structures!
LEGO AMERICAN FLAG
Our LEGO American Flag is made using the basic LEGO bricks! Everyone can make this simple American Flag design. Plus there is a little bit of information on the history of the flag!
ALKA SELTZER POP ROCKETS
Pop Rockets are super simple and only need a couple supplies for a neat chemical reaction.
4TH OF JULY SENORY BOTTLE
Patriotic Discovery Bottle is a little bit science and a little bit visual sensory fun!
MAGIC MILK FIREWORKS
Magic Milk Fireworks is a play on the classic magic milk science experiment. It does really look like a little firework exploding in the milk. Stick with a blue and red theme for Independence Day or try all the colors since fireworks are pretty colorful!
FLAG DENSITY TOWER
American Flag Density Tower from Teaching Mama is a great way to explore the density of liquids with a 4th of July theme. Which liquid is the lightest?
MINT FIREWORKS
Mint Fireworks from Playdough To Plato is a also a classic candy dissolving science activity but check out what the mints look like as dissolve! Test different temperatures of water too!
FIREWORKS IN A JAR
Fireworks In A Jar from I Can Teach My Child is another fun density experiment using oil and water but in a different way than the density tower above.
ABOUT FIREWORKS
The Science Behind Fireworks with Steve Spangler {YouTube video} allows us to use our technology to learn more about fireworks.
What more can you ask for combining patriotic play, cool science, and 4th of July Activities for summer!


