

via Wholesome Babyfood: Did you know that the only difference between peaches and nectarines is the lack of fuzz on the nectarine skin. Nectarines tend to be smaller and more aromatic than peaches and have more red color on the fruit surface. (U.R.I. Horticultural School)
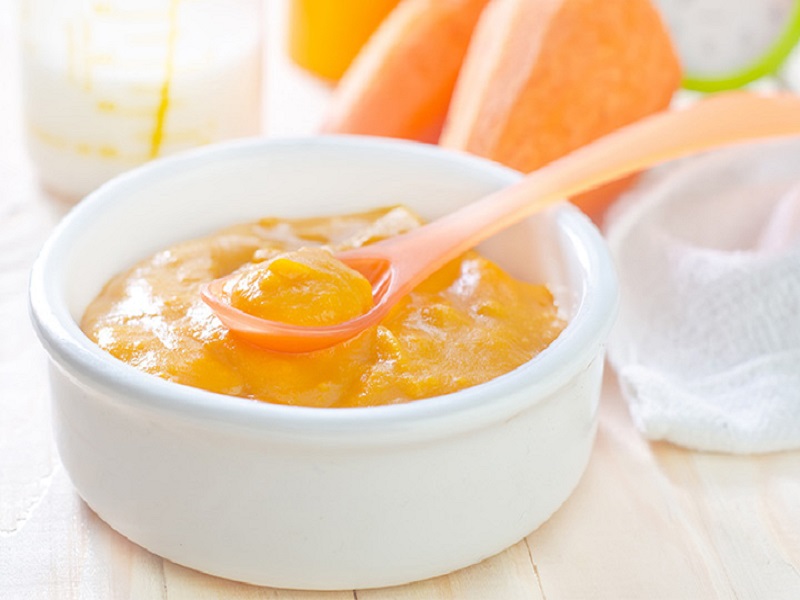
The Goodness of Peaches & Nectarines for Your Baby
Peaches are high in Vitamin C and Vitamin A and they contain a great amount of fiber. Peaches are known to have a diuretic affect and also are a natural laxative. Along with Prunes/Plums, the Peach is a great fruit to give to your baby if constipation has become a problem.
When can my baby have Peaches in baby food recipes?
Many pediatricians recommend that babies may begin to eat Peaches anywhere from 4 to 6 (six) months old. For those that start their babies on solid foods earlier than the recommended 6 months of age, peaches are an easy to digest first food for those between 4-6 months of age. Peaches are yummy, sweet and juicy. They pair well with a lot of other foods for baby such as chicken and bananas and avocado. Peaches may be poached, steamed or baked. Please be aware that Peaches tend to loose their nutritive value with prolonged cooking. Baking peaches or using a microwave to steam them may be the best choice of cooking for optimal nutrient retention. Peaches may be fed to your baby in pureed form alone or mixed into cereals, yogurts, and even in meats such as chicken. Frozen peach slices stuffed into a baby safe feeder are GREAT to help alleviate teething pain. Ripe peaches, or gently cooked peaches, may be diced into small cubes and fed to your baby as a Baby Finger Foods. If you find the dices are too slippery for baby to pick up, coat the dices with crushed and powdered Cheerios or with Wheat Germ. As always, we recommend that you consult with your pediatrician about introducing solid foods to your baby; generalities may not apply to all babies.
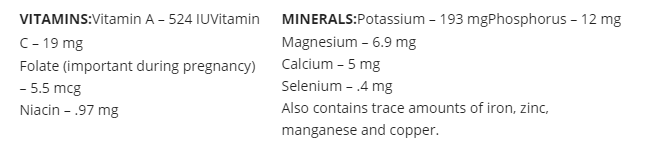
Nutrients in 1 medium sized peach – with skin
foods that are most highly contaminated with pesticides – purchasing organic is a smart choice. Once picked, a Peach or a Nectarine will not get any more sweet or ripe. A Peach or a Nectarine will however become softer and will also become more juicy. When selecting these fruits, you want to ensure that there are no cuts or bruising on the fruit. Purchase peaches and nectarines that are firm yet slightly yielding when gently pressed.
How to peel a Peach to Prepare for Baby Food
Step 1: Scrub fruit clean and carve an X into 1 side of the fruit Step 2: Place X side down in a pan with an inch of water Step 3: Bring water to a boil and steam until soft and tender Step 4: Allow the fruit to cool and then peel the skin from fruit – the skin should slip off very easily.
Tasty & Simple Peach Baby Food Recipes
Steam or Bake or Blanch Peaches for Making Baby’s Peach Puree
These methods work for nectarines, plums and pears as well. I HIGHLY recommend giving baked peaches a try at least once. You will find they are more tasty when baked. Why not try baking for all fruits?
Steam Peaches – Method 1
Step 1: Scrub fruit clean and carve an X into 1 side of the fruit
Step 2: Place X side down in a pan with an inch of water
Step 3: Bring water to a boil and steam until soft and tender
Step 4: Peel skin from fruit and remove pits and/or seeds
Step 5: move to step #6 below
Steam Peaches – Method 2
Step 1: Peel fruit
Step 2: Pit the peach
Step 3: Cut the peach into dices
Step 4: Steam until soft and tender then
Step 5: move to step #6
Bake
Step 1: Halve the fruit, pit and place “open” side down in a pan filled with 1 inch of water
Step 2: Bake at 400F until soft and tender and/or puckering of the skin appears.
Step 3: Peel skin from fruit and remove pits if you did not do so prior to baking (you may also leave the skin on your baked peaches – the skin may simply melt into the fruit.)
Step 4: move to step #6
“Blanch”
Step 1: Bring 3 or 4 cups of water to a rolling boil
Step 2: Add cleansed peaches or nectarines to the boiling water and boil the fruit for 3-5 minutes
Step 3: Remove fruit to a bowl of cold water, allow to cool for 2 minutes
Step 4: Slip off the skins and then take out the pit
Step 5: move to step #6
Moving to Step 6
Step 6: Reserve any left over water to use for thinning out the fruits
Step 7: Peel off skin if you have not done this already. Place fruit(s) into your choice of appliance for pureeing and begin pureeing.
Step 8: Add the reserved water as necessary to achieve a smooth, thin puree
Step 9: Add cereal (if desired) to thicken up.