

Happy International Sushi Day!
Do you let your kids eat sushi?
Despite sushi can appear to be very kid-pleasing, it is not as kid-friendly because many sushi contains raw fish.
There have been many different articles that are being published on various Japanese parenting magazines and websites which discourage parents to feed raw fish product to younger children due to their immature digestive system.
If you would like to try preparing sushi for kids however, there are numerous ways for you to try to make sushi kids-friendly.
Check out the following article now for how you can home make sushi for kids that you little ones will love!
Via Mindful Momma: How to make kid-friendly Sushi
Today I’d like to dispel a nasty rumor about sushi: namely that it must contain raw fish. Truth is, sushi doesn’t have to contain fish at all. The term sushi actually comes from a Japanese word meaning “sour tasting” and refers to the vinegary rice from which sushi is made. Originally, vinegar was probably added to rice as a method of preservation for both the rice and the filling. Another thing you may not know (I didn’t!) is that the vinegar solution used to create sushi rice is called su.
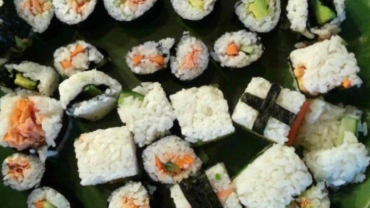
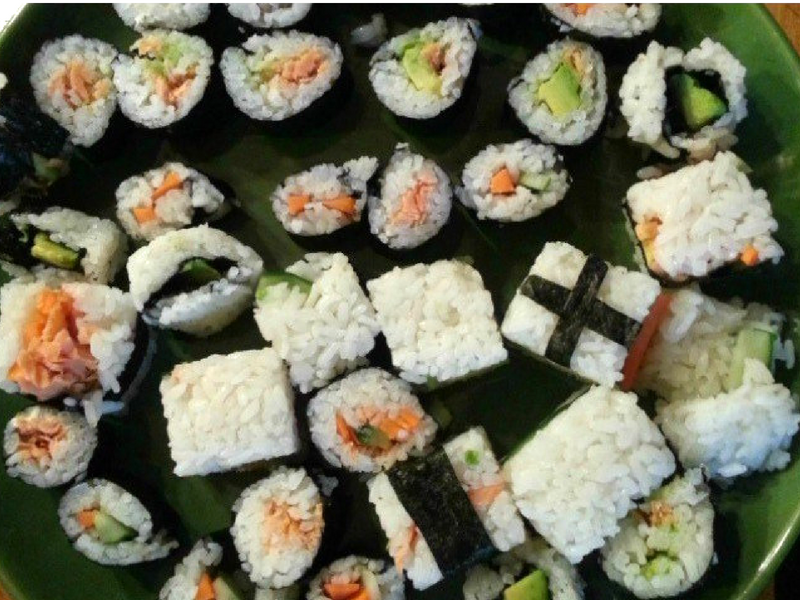
I don’t know about your kids, but my youngest really won’t go for a big hunk of raw fish on his sushi. So for our first sushi-making experience, we decided to stick with fillings that were a little more kid friendly – like avocado, smoked salmon, cream cheese and veggies.
ere’s a little run-down on how we made our kid-friendly sushi:
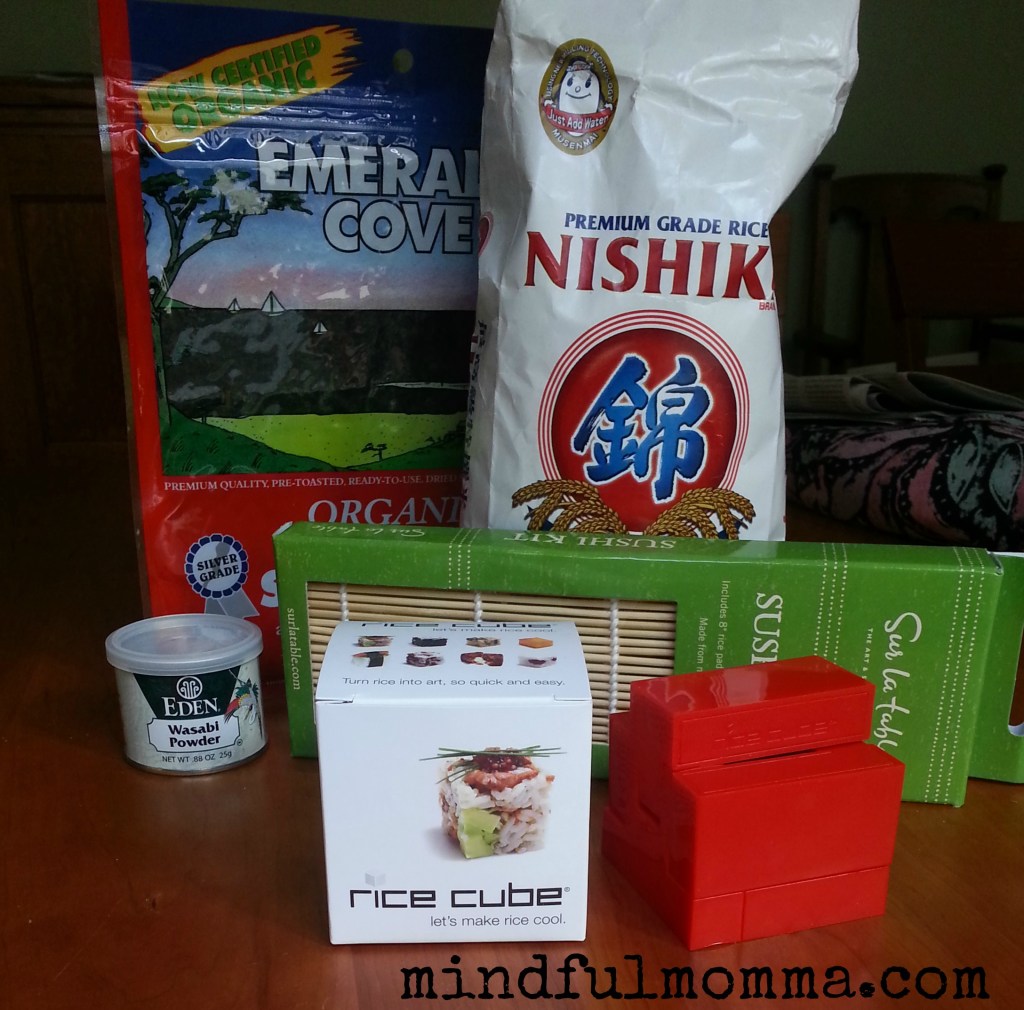
SUPPLIES NEEDED:
- Sushi rice (a sticky, short-grain rice)
- Rice vinegar
- Nori seaweed sheets
- Bamboo sushi rolling mat
- Rice cube (optional but fun!)
- Wooden paddle or spoon for preparing rice
- Large mixing bowl
- Large cutting board or cookie sheet (for cooling prepared rice)
KID-FRIENDLY FILLING IDEAS:
- Avocados
- Carrots
- Scallions (finely diced)
- Cucumbers
- Red peppers
- Smoked Salmon or other cooked fish
- Cream cheese
HOW TO MAKE A SUSHI ROLL:
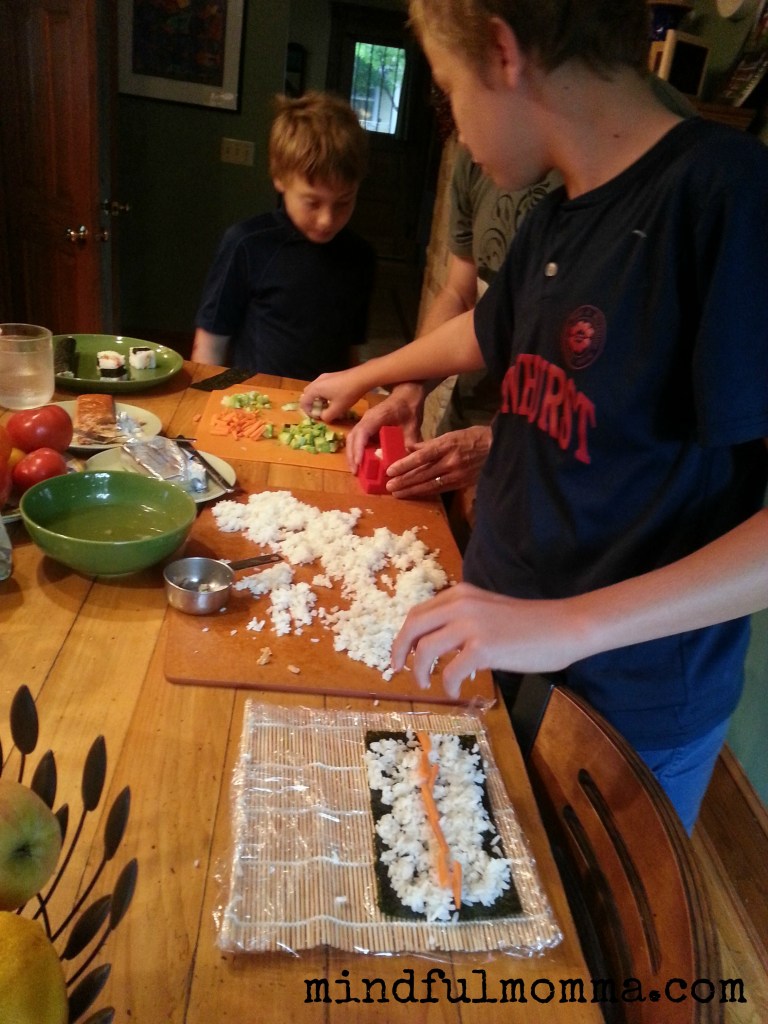
- Make the sushi rice. The Pioneer Woman has a tutorial for perfect sushi rice on her blog. I followed something very similar except that my “su” did not include saki (just rice vinegar, sugar and a tiny bit of salt)
- Spread prepared rice on a cutting board or cookie sheet (to allow it to continue to cool).
- Prepare a bowl of “hand vinegar” (1 cup water, 1/4 cup rice vinegar) for working with rice.
- Cover bamboo mat with plastic wrap (not sure if this is traditional, but we were following the instructions that came with the rolling mat).
- Lay a piece of nori on the mat, then top with a 1/4 inch layer of rice. (dip fingers in hand vinegar to keep rice from sticking)
- Add a thin strip of filling in the middle.
- Starting with the bottom edge of the mat, roll up and away from you, pressing lightly while you roll. At the very end you will need to pull out the mat so you can finish the roll (hard to explain but you’ll know when you do it). Press lightly to seal the edges together.
- For an inside-out roll, flip over the nori and rice so that the rice is on the outside when you roll!
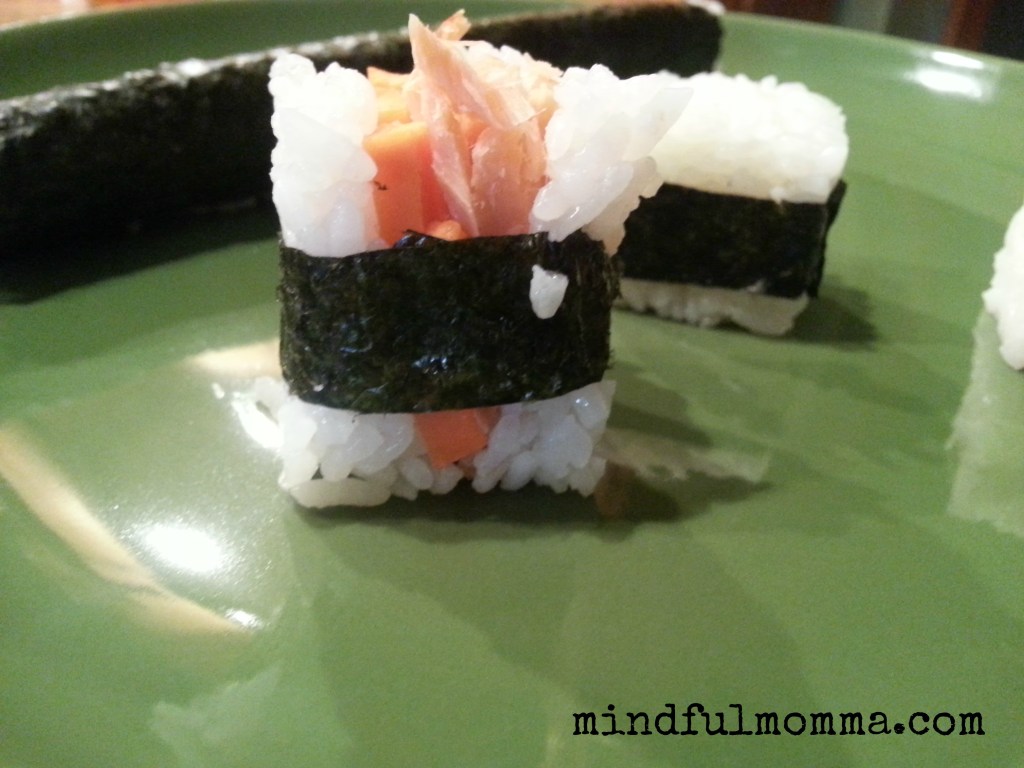
We also had tons of fun with the Rice Cube. It squishes the rice and fillings into cubes. Aren’t they cute?